
Introduction
Installing laminate flooring is a great way to update the look and feel of your home without breaking the bank. In this step-by-step guide, I will walk you through the process of installing laminate flooring, from selecting the right materials to completing the final touches. Whether you are a seasoned DIY-er or a first-timer, this guide will provide you with all the information you need to successfully tackle this project.
What is laminate flooring?
Laminate flooring is a versatile and durable option for homeowners who want the look of hardwood or tile without the high price tag. It is made up of multiple layers, typically including a HDF (high-density fiberboard) or MDF (medium-density fiberboard) core, a photographic layer that mimics the appearance of natural materials, and a protective layer that adds durability and resistance to wear and tear.
Advantages of laminate flooring
There are several advantages to choosing laminate flooring for your home. Firstly, it is more affordable compared to hardwood or tile, making it a budget-friendly option for those looking to update their flooring. Additionally, laminate flooring is easy to install, thanks to its click-lock installation system, which means you can save on labor costs by doing it yourself. It is also low maintenance, as it resists stains, scratches, and fading, making it a great choice for high-traffic areas. Lastly, it offers a wide range of styles and finishes, allowing you to find the perfect look to complement your home’s aesthetic.
Now that you have a better understanding of what laminate flooring is and its advantages, let’s dive into the step-by-step process of installing it in your own home. So, grab your measuring tape and let’s get started on this exciting DIY project!
Planning and Preparation
When it comes to installing laminate flooring, proper planning and preparation are essential for achieving a successful outcome. Before diving into the installation process, I recommend taking the time to measure the area, choose the right laminate flooring, and gather all the necessary tools and materials.
Measure the Area
Before purchasing your laminate flooring, it’s crucial to measure the area where you intend to install it. This will help you determine the quantity of laminate flooring you’ll need to purchase, ensuring that you don’t run out or end up with excess materials.
To measure the area, simply use a tape measure to determine the length and width of the space. Multiply these measurements to calculate the total square footage. It’s also important to account for any irregularities, such as alcoves or closets, by measuring these separately and adding them to the overall square footage.
Choose the Right Laminate Flooring
Selecting the right laminate flooring is another important step in the planning process. Consider factors such as the color, texture, and thickness of the laminate, as well as the overall style and design of your space. It’s also worth considering the durability and water-resistance properties of the laminate, depending on the specific area where it will be installed.
Gather Necessary Tools and Materials
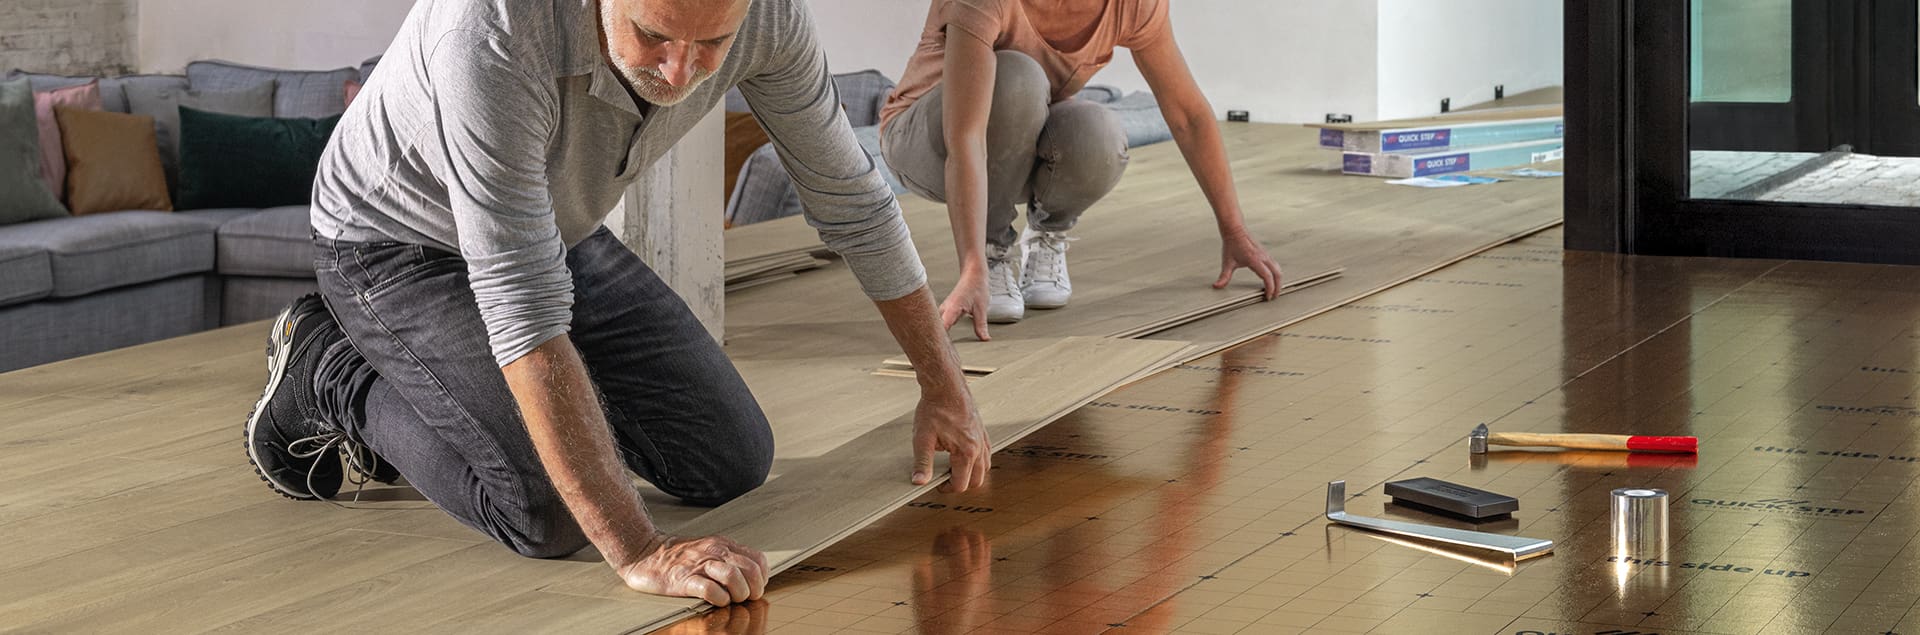
Before starting the installation, it’s important to gather all the necessary tools and materials. Some essential items you’ll need include a tape measure, pencil, circular saw or laminate cutter, underlayment, spacers, a tapping block, and a hammer. Additionally, make sure to have a clean and debris-free workspace, as well as some knee pads for added comfort during the installation process.
By carefully measuring the area, choosing the right laminate flooring, and gathering all the necessary tools and materials, you’ll be well-prepared for the installation process. In the following sections, I’ll guide you through each step of the installation, ensuring a smooth and successful outcome. So, let’s get started and transform your space with beautiful laminate flooring!
Preparing the Subfloor
Installing laminate flooring can be a great DIY project that can give your home a fresh new look. However, before you begin, it’s important to properly prepare the subfloor to ensure a smooth and durable installation. In this section, I will guide you through the necessary steps to prepare your subfloor for laminate flooring.
Clean the Subfloor
First, you’ll want to make sure the subfloor is clean and free from any debris or dirt. Sweep or vacuum the area to remove any loose particles. This will prevent any bumps or imperfections from forming under the laminate flooring.
Level the Subfloor
Next, you’ll need to check the levelness of the subfloor. Use a level and place it at various points across the floor to check for any unevenness. If you notice any significant dips or bumps, you may need to level the subfloor. This can be done by adding a self-leveling compound to even out any low or high spots.
Repair Any Damages
Inspect the subfloor for any damages, such as loose boards or cracks. If you come across any, it’s important to repair them before proceeding with the installation. Replace any damaged boards and fill any cracks or gaps with a suitable wood filler or leveling compound. This will help ensure the stability and durability of your laminate flooring.
By following these steps to prepare your subfloor, you can create a solid foundation for your laminate flooring installation. Taking the time to properly prepare the subfloor will result in a smoother installation process and a finished product that you can enjoy for years to come. Now that you’ve prepared the subfloor, it’s time to move on to the next step – laying the underlayment.

Underlayment Installation
Installing the underlayment is the first step in the process of installing laminate flooring. The underlayment is a crucial component as it helps to provide support, stability, and moisture resistance for the laminate planks. Here’s a step-by-step guide to help you with the underlayment installation.
Select and Install Underlayment Material
First, you need to choose the right underlayment material for your laminate flooring. There are various types available, such as foam, cork, and rubber. Consider factors like sound insulation, moisture protection, and the specific requirements of your space before making a selection.
Once you have chosen the underlayment material, carefully measure the area to determine the amount you’ll need. Trim the underlayment sheets to fit the space, leaving a small gap around the edges to allow for expansion.
Next, starting in one corner of the room, lay down the first sheet of underlayment. Make sure to align it with the longest wall. Use a staple gun to secure the underlayment to the subfloor, spacing the staples every 6-8 inches along the edges and every 12 inches in the center.
Ensure Even Coverage
As you progress, make sure to overlap the edges of each underlayment sheet by at least 2-3 inches. This will help to create a seamless and even surface for your laminate flooring. Additionally, ensure that there are no gaps or overlaps between the underlayment sheets to prevent any imperfections or unevenness in the final flooring.
Continue installing the underlayment sheets, making sure to butt them tightly together. Trim any excess material as needed to maintain a neat and professional appearance. Remember to work from one end of the room to the other, securing each sheet with staples as you go.
By following these steps, you can successfully install the underlayment for your laminate flooring. With a properly installed underlayment, you’ll have a solid foundation to start laying the laminate planks and achieve a beautiful, durable, and long-lasting floor. So, let’s move on to the next step – laying the laminate planks.

Acclimation of Laminate Flooring
Allow laminate flooring to adjust to room conditions
Before starting the installation process, it is important to allow your laminate flooring to acclimate to the room’s conditions. This step is essential in ensuring a successful and long-lasting installation. Laminate flooring is made of multiple layers, including a decorative wear layer, a core layer, and a stabilizing backing layer, which can all be affected by changes in temperature and humidity.
To properly acclimate your laminate flooring, I recommend following these steps:
-
Purchase your laminate flooring materials and bring them into the room where they will be installed. Leave the boxes unopened for at least 48 hours to allow the flooring to adjust to the temperature and humidity of the room.
-
During this acclimation period, keep the room’s temperature and humidity levels consistent with the normal living conditions. This will help the flooring adapt and prevent any potential issues, such as warping, buckling, or gaps between the planks.
-
Keep in mind that laminate flooring should be stored horizontally, not vertically, to prevent any damage or bowing of the boards.
By allowing your laminate flooring to acclimate properly, you are ensuring that it will be stable and ready for installation. This step is especially important if you live in an area with significant temperature and humidity fluctuations. Skipping this crucial step may result in costly repairs or a compromised installation that won’t stand the test of time.
Now that your laminate flooring has acclimated, it’s time to move on to the next step in the installation process. Stay tuned for the next section of this guide, where I will walk you through the preparation of the subfloor and the necessary tools you’ll need.
Laying the First Row
Choose the starting wall
When it comes to installing laminate flooring, it’s important to determine which wall will serve as the starting point for your project. It’s generally recommended to begin from the longest straight wall in the room, as this will help ensure a smooth and even installation. Take into consideration any obstructions or transitions that may affect the placement of the planks, and choose a wall that allows for a natural flow throughout the space.
Install spacers to maintain expansion gap
Before laying down the laminate planks, it’s crucial to create an expansion gap around the perimeter of the room. This gap provides the necessary space for the flooring to expand and contract with changes in temperature and humidity, preventing buckling or warping. To achieve this, I use spacers along the walls to maintain a consistent gap. These spacers can be easily found at your local hardware store and are typically available in various thicknesses to accommodate different installation needs.
Cut and lay the first row of laminate
Now that the starting wall has been chosen and the spacers are in place, it’s time to begin laying the laminate flooring. Start by measuring and cutting the planks to fit the desired length, ensuring that each end is properly aligned with the spacers. To achieve a seamless transition between planks, I recommend using a miter saw or a circular saw with a fine-toothed blade. Once the first row is cut, simply click the planks together, using a gentle tapping motion to secure them in place. Remember to leave a small gap between the planks and the walls to allow for expansion.
With these steps completed, you’re well on your way to installing beautiful laminate flooring in your space. By carefully selecting the starting wall, installing spacers for the expansion gap, and properly cutting and laying the first row of laminate, you’ll be able to achieve a professional-looking result without the need for a professional installer. So roll up your sleeves and get ready to transform your room with this rewarding and budget-friendly DIY project.
Continuing with Subsequent Rows
Once you have successfully installed the first row of laminate flooring, it’s time to move on to the subsequent rows. These steps will guide you through the process of continuing the installation, ensuring a seamless and professional-looking finished result.
Install subsequent rows using a staggered pattern
To create a visually appealing and structurally sound laminate floor, it is important to install the subsequent rows using a staggered pattern. This means that the end joints of each plank in one row should not align with the end joints of the planks in the adjacent row. I find that starting each new row with a plank that is at least 12 inches in length from the previous row creates the best staggered effect.
Cut and fit laminate around obstacles
During the installation process, you may encounter obstacles such as door frames, vents, or corners that require you to cut and fit the laminate around them. To do this, measure and mark the necessary cuts on the laminate plank, making sure to leave a small gap for expansion. Use a jigsaw or a laminate flooring cutter to carefully make the cuts. Once the plank fits snugly around the obstacle, you can continue with the installation.
Remember, safety should always be a priority. Use appropriate safety equipment, such as goggles and gloves, when handling tools and making cuts. Take your time and double-check your measurements to ensure accuracy.
By following these simple steps, you will be able to confidently continue with subsequent rows of laminate flooring installation. Remember to maintain a staggered pattern for a professional look and take your time when cutting and fitting laminate around obstacles. With each row you complete, you’ll be one step closer to achieving a beautiful and durable laminate floor.

Installing Transition Pieces
Transition pieces are an essential component when it comes to installing laminate flooring. They help in creating a smooth and seamless transition between rooms and different types of flooring. In this section, I will guide you through the installation process for transition strips and threshold strips or reducers.
Install transition strips for doorways
When transitioning from one room to another, it’s important to ensure that the laminate flooring flows seamlessly. To achieve this, you will need to install transition strips for doorways. Begin by measuring the width of the doorway and cut the transition strip accordingly. Next, place the strip on the floor where the two floorings meet, making sure it overlaps both surfaces. Secure it in place using adhesive or nails, depending on the type of strip you have chosen. Repeat this process for all the doorways in your home.
Add threshold strips or reducers
Threshold strips or reducers are used to bridge the gap between laminate flooring and other surfaces like carpet or different types of flooring. To install them, measure and cut the strip to the desired length. Then, evenly apply adhesive to the back of the strip and press it firmly against the edge of the laminate flooring. Make sure it is aligned properly and there are no gaps. Finally, allow the adhesive to dry completely before walking on the threshold strip.
By following these steps to install transition strips and threshold strips or reducers, you can ensure a professional-looking finish to your laminate flooring project. Remember to measure accurately, use the right tools, and take your time during the installation process to achieve the best results. Happy flooring!

Finishing Touches
Once you have successfully installed your laminate flooring using this step-by-step guide, there are a few finishing touches you can add to ensure a polished and professional look. In this section, I will guide you through trimming excess underlayment and laminate, as well as installing baseboards or shoe molding.
Trim Excess Underlayment and Laminate
After laying down the laminate flooring, you may notice that there is excess underlayment or laminate sticking out in certain areas. To achieve a neat and seamless finish, it is important to trim off these excess materials. I recommend using a sharp utility knife or a jigsaw for this task.
Start by measuring the area that needs to be trimmed and mark it carefully. Then, using the appropriate tool, slowly and steadily cut along the marked line. Take your time to ensure precision and avoid any damages to the surrounding flooring.
Install Baseboards or Shoe Molding
To conceal the expansion gap around the edges of your laminate flooring, it is essential to install baseboards or shoe molding. This not only adds a polished look, but also protects the edges of the flooring from potential damage.
Begin by selecting the appropriate style and size of baseboards or shoe molding that complements your laminate flooring. Using a measuring tape, measure and cut the pieces to fit each section. Then, using a brad nailer or a hammer and finishing nails, secure the baseboards or shoe molding to the wall, ensuring that they are flush against the flooring.
Once all the pieces are securely installed, fill any nail holes with wood filler and sand the surface until smooth. Finally, apply a coat of paint or stain to match the color of the baseboards or shoe molding.
By following these simple steps, you can add those important finishing touches to your newly installed laminate flooring. Remember, attention to detail is crucial to achieve a professional and stylish result. Happy flooring!
Cleaning and Maintenance
Maintaining the cleanliness and longevity of your laminate flooring is essential to ensure its beauty and functionality over time. Here are some simple steps you can follow to keep your laminate flooring in pristine condition.
Sweep and vacuum regularly
Regularly sweeping and vacuuming your laminate flooring is the first step in maintaining its cleanliness. This helps remove dust, dirt, and any other loose debris that can scratch or damage the surface. I recommend using a soft-bristle broom or a vacuum cleaner with a soft brush attachment to prevent any potential scratches.
Use recommended laminate floor cleaner
Using the right cleaning products is crucial to prevent any potential damage to your laminate flooring. It’s important to use a cleaner specifically designed for laminate floors, as regular household cleaners can be too harsh and may cause discoloration or warping. I personally use a laminate floor cleaner recommended by the manufacturer, as it is formulated to effectively clean the surface without leaving any residue.
To clean your laminate flooring, simply follow the instructions on the cleaner’s label. Typically, you will need to dilute the cleaner with water and use a damp mop or cloth to gently clean the surface. Avoid using excessive water as it can seep into the seams and cause damage.
In addition to regular sweeping and cleaning, it’s important to address any spills or stains immediately. Wipe them up promptly using a clean, damp cloth to prevent them from penetrating the surface of the laminate flooring.
By following these simple cleaning and maintenance steps, you can ensure that your laminate flooring remains beautiful and durable for years to come. Remember, proper care and maintenance are key to extending the life of your flooring and preserving its original luster.
Conclusion
Installing laminate flooring can be a rewarding and cost-effective DIY project that can significantly improve the look of your home. By following this step-by-step guide, you can confidently install laminate flooring without the need for professional help.
Enjoy your newly installed laminate flooring
After completing the installation process, take a moment to admire your newly installed laminate flooring. You have successfully transformed your space, and now you can enjoy the beauty and functionality of your new flooring. Whether you choose a classic hardwood appearance or opt for a more modern tile or stone design, laminate flooring offers a wide range of options to suit any style preference.
Remember to take proper care of your laminate flooring to ensure its longevity. Regular sweeping and vacuuming will remove dirt and debris, while mopping with a damp cloth or dry mop will help maintain its shine. Avoid using harsh cleaners or excessive water, as this can damage the laminate.
In the event of any spills or accidents, promptly clean up the mess to avoid staining or swelling of the laminate flooring. It is also recommended to place furniture pads under the legs of your furniture to prevent scratches. With proper care, your laminate flooring will continue to look great for years to come.
I hope this step-by-step guide has been helpful in guiding you through the process of installing laminate flooring. Remember to measure accurately, prepare your subfloor properly, and take your time during installation. With patience and attention to detail, you can achieve professional-looking results and transform your space with beautiful laminate flooring. Happy DIYing!