Have you ever wondered how to keep your bike in top shape without having to bring it to a bike shop? Well, I’ve got some great news for you! Today, I want to talk about DIY bicycle maintenance and share with you some expert techniques that will help you keep your bike performing at its best. So, if you’re ready to roll up your sleeves and learn some valuable bike maintenance skills, then keep reading!
When it comes to bike maintenance, there are so many things you can do yourself to keep your ride running smoothly. From basic tasks like cleaning and lubricating the chain to more advanced procedures like adjusting gears and brakes, mastering DIY bicycle maintenance is definitely worth your time and effort. Not only will it save you money by reducing the need for professional bike repairs, but it’s also a great way to understand your bike better and feel more confident in your own abilities. In this article, we’ll explore some essential techniques and tips for maintaining your bike, step by step. So, whether you’re a seasoned cyclist or a newbie just getting started, get ready to become your own bike mechanic and keep your trusty two-wheeler in tip-top shape!
Mastering DIY Bicycle Maintenance: Expert Techniques for Keeping Your Bike at its Best
As a passionate cyclist, I know that regular bicycle maintenance is crucial to keep your bike in top shape. Whether you’re riding for leisure, commuting, or competing in races, taking care of your bike is essential for extending its lifespan, saving money on repairs, and ensuring your safety and reliability on the road. In this article, I will guide you through the steps and techniques to master DIY bicycle maintenance, providing you with the knowledge and confidence to keep your bike performing at its best.
Extend the Lifespan of Your Bike
Regular maintenance is the key to extending the lifespan of your bike. A well-maintained bike will stay in optimal condition for many years, providing you with countless enjoyable rides. By performing routine checks and maintenance tasks, you can prevent small issues from turning into major problems that could result in costly repairs or even the need for a new bike.
Save Money on Repairs
One of the benefits of DIY bicycle maintenance is the cost-saving aspect. By learning how to perform basic repairs and maintenance tasks on your own, you can save money on labor costs that would otherwise be incurred from taking your bike to a professional bike shop. Additionally, being able to troubleshoot and fix minor issues promptly can prevent further damage to your bike, saving you from expensive replacement parts.

Increase Safety and Reliability
Keeping your bike well-maintained is crucial for your safety on the road. Regular maintenance ensures that all components are functioning properly, reducing the risk of accidents caused by mechanical failure. By taking the time to inspect and maintain your bike, you can have peace of mind knowing that your bike is reliable and safe to ride.
Essential Tools for DIY Bicycle Maintenance
Before diving into the various maintenance tasks, it’s important to have the right tools on hand. Here are the essential tools you’ll need to perform DIY bicycle maintenance:
1. Allen Wrench Set
An Allen wrench set is a must-have tool for any bike owner. It allows you to tighten and loosen bolts and screws found on various components of your bike, including the handlebars, stem, seatpost, and brake calipers.
2. Chain Tool
A chain tool is used to repair or replace a broken chain. It allows you to remove damaged or worn-out links and reattach the chain securely.
3. Tire Levers
Tire levers are essential for removing and reinstalling tires without damaging the rims. They are used to pry the tire away from the rim, making it easier to replace inner tubes or fix punctures.
4. Pedal Wrench
A pedal wrench is necessary for removing and installing pedals. It features a long handle and thin jaws that fit perfectly around the pedal axle, providing the leverage needed to tighten or loosen the pedals.
5. Bike Pump
A bike pump is essential for ensuring proper tire inflation. Choose a pump that is compatible with your valve type (either Presta or Schrader) and has a pressure gauge to accurately gauge tire pressure.
6. Cable Cutters
Cable cutters are used to trim and install new cables and housing on your bike. They provide clean and precise cuts, ensuring a smooth operation of your brake and gear cables.
7. Crank Puller
A crank puller is necessary for removing the crank arms from the bike’s bottom bracket. It allows for easy maintenance and replacement of the crankset.

Performing a Basic Bike Safety Check
Before diving into specific maintenance tasks, it’s crucial to perform a regular safety check on your bike. This check ensures that all essential components are in good working order and can help identify any potential issues that need to be addressed. Here are the steps to perform a basic bike safety check:
Inspecting the Frame and Fork
Start by visually inspecting the frame and fork for any cracks, dents, or signs of damage. Check for loose or damaged bolts that may need tightening or replacing. Ensure that the frame and fork are aligned properly, without any visible misalignment.
Checking the Brakes
Test the front and rear brakes by squeezing the brake levers. Ensure that the brake pads make contact with the rims and that the braking action is smooth and responsive. Inspect the brake pad wear and replace them if they are worn down to the wear indicators.
Examining the Tires and Wheels
Check the tires for any visible cuts, bulges, or excessive wear. Ensure that the tire pressure is within the recommended range. Spin the wheels and look for wobbles or unevenness. Tighten any loose spokes and consider getting the wheels trued if necessary.
Ensuring Proper Chain Tension and Lubrication
Check the chain tension by gently pulling it away from the front chainring. There should be a slight amount of play. Lubricate the chain using a bicycle-specific chain lubricant, ensuring that it is evenly distributed. Wipe off any excess lubricant to prevent attracting dirt and debris.
Testing the Gears and Shifters
Shift through all the gears and ensure smooth and precise shifting. Inspect the gear cables for fraying or damage and replace them if necessary. Adjust the derailleurs if the shifting is not smooth or if the gears are skipping.
Cleaning and Lubricating Your Bike
Regular cleaning and lubrication are essential to keep your bike running smoothly and prevent premature wear on components. Here are the steps to effectively clean and lubricate your bike:
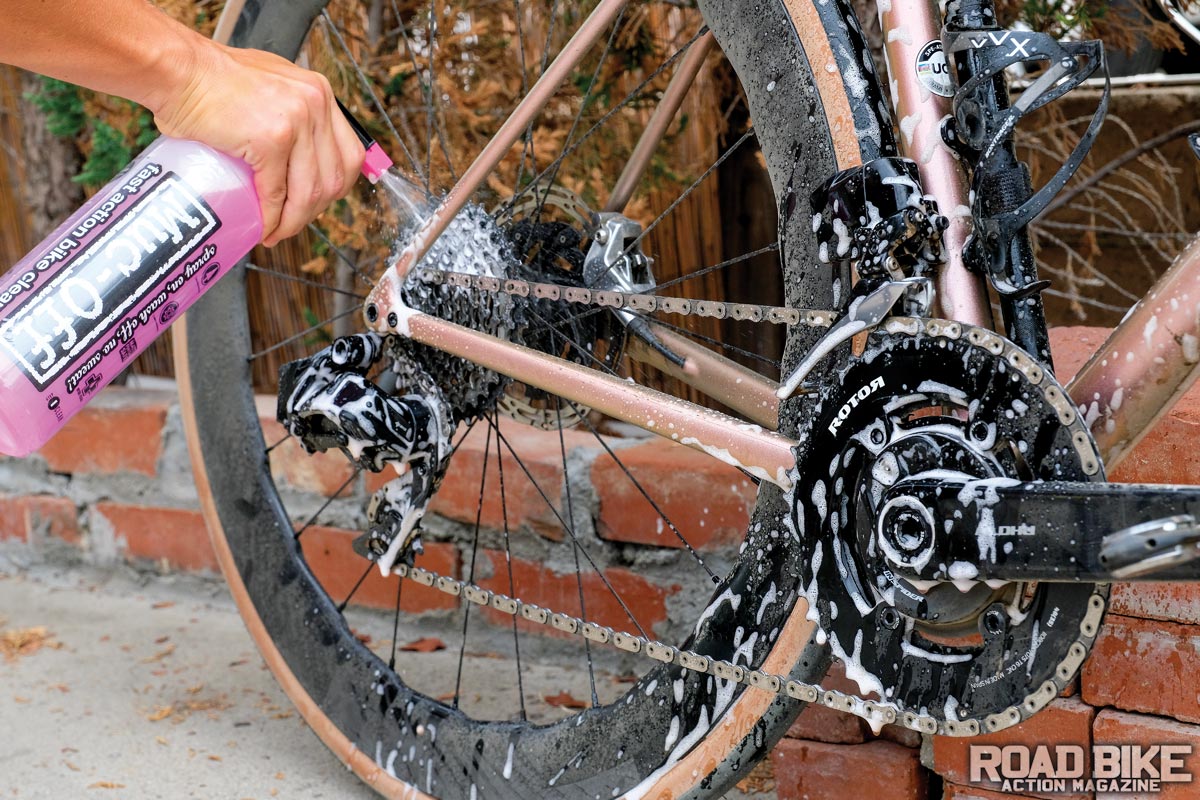
Choosing the Right Cleaning Products
Use a gentle bike-specific cleaner or mild dish soap mixed with water to clean your bike. Avoid harsh cleaners that could damage the paint or components. Additionally, have a bucket of clean water and a brush or sponge ready for scrubbing.
Cleaning the Frame, Wheels, and Components
Start by wetting your bike with water to remove any loose dirt. Apply the cleaning solution to the frame, wheels, and components, and use a brush or sponge to scrub away dirt and grime. Pay attention to hard-to-reach areas such as the drivetrain and bottom bracket. Rinse off the cleaning solution with water and dry the bike thoroughly.
Lubricating the Chain and Moving Parts
Apply a small amount of lubricant to the chain while spinning the pedals backward. Allow the lubricant to penetrate the links, then wipe off any excess with a clean rag. Apply a light lubricant to other moving parts such as derailleurs, brake pivots, and cables.

Adjusting the Brakes for Optimal Performance
Properly functioning brakes are crucial for your safety on the road. Here’s how you can adjust your bike’s brakes for optimal performance:
Inspecting Brake Pads and Rotors
Inspect the brake pads for wear and replace them if they are worn down beyond the wear indicators. Ensure that the brake pads make even contact with the brake track on the rim or the rotors. Adjust or replace the pads if necessary.
Aligning the Brake Calipers
Check the alignment of the brake calipers. Ensure that the brake pads make even contact with the rim or rotor when the brakes are engaged. Adjust the brake calipers by loosening the mounting bolt and aligning the pads properly. Retighten the bolt to secure the caliper in place.
Adjusting the Brake Cable Tension
Ensure that the brake cables have proper tension. Squeeze the brake lever and inspect the movement of the brake pads. If there is excessive play or the pads do not make contact with the rim or rotor, adjust the cable tension using the barrel adjuster or by tightening the cable clamp. Test the brakes and make further adjustments if necessary.
Maintaining the Drivetrain
The drivetrain of your bike consists of the chain, cassette, and chainrings, and it requires regular maintenance to ensure smooth and efficient gear shifting. Here’s how to maintain the drivetrain:
Cleaning and Lubricating the Chain
Clean the chain using a degreaser and a brush specifically designed for chain cleaning. Scrub the chain thoroughly to remove dirt and grime. Rinse off the degreaser, dry the chain, and apply a bicycle-specific lubricant. Wipe off any excess lubricant.
Checking and Replacing the Cassette
Inspect the cassette for wear. If the teeth on the cassette are worn down or have a “shark tooth” appearance, it’s time to replace the cassette. Remove the old cassette using a chain whip and cassette lockring tool, and install the new cassette.
Inspecting and Replacing the Chainrings
Inspect the chainrings for wear, specifically the teeth. If the teeth are noticeably worn down or have a hooked shape, it’s time to replace the chainrings. Remove the bolts securing the chainrings and install the new ones. Ensure proper chainring alignment and torque the bolts to the manufacturer’s specifications.

Ensuring Smooth Shifting with Proper Gear Adjustment
Properly adjusted gears are essential for smooth and efficient shifting. Here’s how to check and adjust the front and rear derailleurs:
Checking and Adjusting the Front Derailleur
Shift the chain onto the smallest chainring. Inspect the alignment of the derailleur cage with the chain. If it is not parallel to the chain, adjust the limit screws and cable tension to align it properly. Shift through all the chainrings and ensure smooth and precise shifting.
Inspecting and Adjusting the Rear Derailleur
Shift the chain onto the smallest cog on the cassette. Inspect the alignment of the derailleur pulley with the cog. If it is not parallel to the cog, adjust the limit screws and cable tension to align it properly. Shift through all the gears and ensure smooth and precise shifting.
Fine-tuning the Gear Shifter
If your gear shifting feels imprecise or lagging, fine-tuning the gear shifter may be necessary. Consult the user manual or online resources specific to your shifter model for detailed instructions on adjusting the indexing or trim.
Maintaining and Repairing Flat Tires
Flat tires are a common occurrence for cyclists, but with the right knowledge, you can quickly fix them yourself. Here’s how to maintain and repair flat tires:
Removing and Installing the Tire
Use tire levers to pry the tire bead away from the rim. Work your way around the tire, lifting one section at a time until the entire tire is free from the rim. To reinstall the tire, start at the valve stem and work your way around, pushing the tire bead into the rim.
Locating and Fixing a Puncture
Inflate the inner tube slightly to identify the location of the puncture. Once located, mark the area with a pen or a small piece of tape. Deflate the tube and patch the punctured area using a puncture repair kit. Follow the instructions provided with the kit for best results.
Replacing the Inner Tube
If the puncture is too large to patch or if the tube is damaged beyond repair, it’s necessary to replace the inner tube. Remove the old tube, and install a new one by aligning the valve with the hole in the rim. Inflate the tube slightly to ensure it is seated properly before fully inflating it.

Adjusting the Bike’s Seat and Handlebar Position
Proper bike fit is crucial for comfort and optimal performance. Here’s how to adjust the seat and handlebar position:
Finding the Proper Seat Height
Adjust the seat height by loosening the seat clamp bolt and raising or lowering the seatpost to achieve the desired height. Ensure that the seatpost is inserted into the frame to the minimum insertion mark for safety.
Adjusting the Seat Angle
Loosen the seat clamp bolt and adjust the seat angle to suit your preference. A level or slightly tilted-forward position is usually recommended for optimal power transfer and comfort.
Setting the Handlebar Height and Reach
To adjust the handlebar height, loosen the stem bolts and raise or lower the stem to the desired position. Ensure that the stem is aligned with the front wheel for proper handling. Adjust the handlebar reach by positioning the stem horizontally or at a slight angle.
Inspecting and Replacing Worn Out Bike Components
Over time, certain bike components will wear out and require replacement. Regular inspections allow you to identify worn-out components and address them promptly. Here are some common components to inspect:
Determining Wear on Brake Pads
Inspect the brake pads for signs of wear. If the pad material is significantly worn down, exposing the metal or if the pads feel hard and unresponsive, it’s time to replace them. Follow the manufacturer’s instructions for replacing brake pads specific to your brake system.
Checking Chain and Cassette Wear
Check the chain for wear using a chain wear indicator tool. If the tool indicates significant stretching, it’s time to replace the chain. A worn chain can accelerate wear on the cassette, so inspect the cassette for wear as well. If the cassette teeth show signs of significant wear, it’s recommended to replace both the chain and the cassette together.
Inspecting and Replacing Worn-out Tires
Inspect the tire tread and sidewalls for signs of wear, cuts, or punctures. If the tread is significantly worn down or if the sidewalls are damaged, it’s time to replace the tires. Ensure that you choose tires that are compatible with your rim width and intended riding conditions.
Troubleshooting Common Bike Issues
While regular maintenance can prevent many issues, occasionally, you may encounter problems with your bike. Here are some common bike issues and how to troubleshoot them:
Fixing Chain Slippage
If your chain slips or skips while pedaling, it may be caused by a worn chain, worn cassette, or improper shifting. Start by checking the chain wear and replacing it if necessary. If the problem persists, inspect the cassette for wear and consider replacing it. Ensure that the derailleurs are properly adjusted for smooth shifting.
Resolving Brake Noise
Brake noise can be caused by a variety of factors, including contaminated brake pads, misaligned brake calipers, or worn-out brake pads. Start by cleaning the brake pads and rotors with isopropyl alcohol or brake cleaner. Check the alignment of the brake calipers and adjust them if necessary. If the pads are significantly worn or contaminated, replace them.
Addressing Shifting Problems
If you’re experiencing issues with gear shifting, such as slow or hesitant shifting, skipping gears, or difficulty shifting into specific gears, it may be due to improper cable tension, worn gears, or damaged shifters. Start by adjusting the cable tension according to the derailleur manufacturer’s instructions. If the problem persists, inspect the gears for wear and replace them if necessary. Consider having the shifters inspected and serviced by a professional if the issue persists.
Advanced Techniques for DIY Bike Maintenance
Once you have mastered the basics of DIY bicycle maintenance, you may want to explore advanced techniques that require specialized tools or technical knowledge. Here are some advanced techniques you may consider tackling:
Wheel Truing and Tensioning
Truing a wheel involves adjusting the spoke tension to correct any lateral or radial wobbles. This process requires a truing stand, spoke wrench, and knowledge of wheel mechanics. If you’re up for the challenge, you can learn how to true and tension your wheels using online resources or by consulting a professional.
Bottom Bracket Maintenance
Maintaining the bottom bracket involves removing and cleaning or replacing the bearings, as well as regreasing the threads. This requires specialized tools like a bottom bracket tool, as well as the knowledge of your specific bottom bracket type. If you’re comfortable with advanced mechanical tasks, you can tackle bottom bracket maintenance.
Headset Overhaul
Overhauling the headset involves removing and cleaning or replacing the headset bearings, as well as regreasing the threads. This requires specific headset tools and knowledge of your headset type. Properly maintaining the headset ensures smooth steering and minimizes wear on the bearings.
Storing and Transporting Your Bike
Properly storing and transporting your bike is essential to prevent damage and ensure its longevity. Here are some guidelines for storing and transporting your bike:
Choosing the Right Storage Location
When storing your bike, choose a dry and climate-controlled area to minimize exposure to moisture and extreme temperatures. Consider using a bike rack or wall mount to keep your bike off the ground and protect it from accidental damage.
Properly Preparing Your Bike for Transportation
Before transporting your bike, remove any accessories, such as lights or saddlebags, and securely wrap them separately. Lower the seat and rotate the handlebars to align them parallel to the frame. Use bike-specific padding or a bike bag to protect your bike during transportation.
Securing Your Bike on a Rack or in a Vehicle
When transporting your bike on a rack or in a vehicle, use secure straps or bungee cords to fix it in place. Ensure that the bike is stable and cannot move or sway during transport. Take care to protect the frame and components from scratches or damage caused by contact with other objects.
Conclusion
By mastering DIY bicycle maintenance, you can extend the lifespan of your bike, save money on repairs, and increase your safety and reliability on the road. With the right tools, knowledge, and techniques, you can confidently perform essential maintenance tasks such as cleaning and lubricating your bike, adjusting brakes and gears, repairing flat tires, and inspecting and replacing worn-out components. Advanced techniques such as wheel truing, bottom bracket maintenance, and headset overhaul can further enhance your DIY skills. Remember to prioritize safety and consult professional help whenever necessary. With regular maintenance and care, your bike will continue to bring you joy and serve you well in all your cycling adventures. Happy riding!