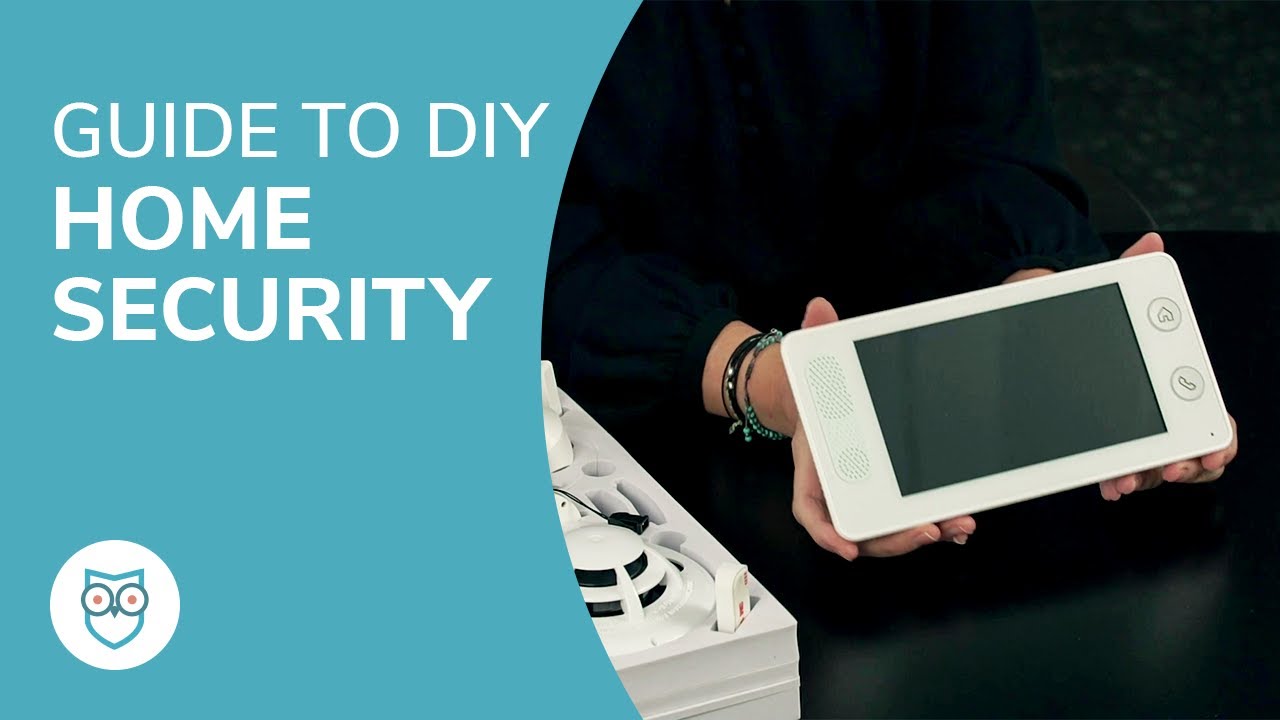
Easy Step-by-Step Instructions for Installing a Home Security System
Introduction
Welcome! In this guide, I will take you through the process of installing a home security system. Whether you are concerned about the safety of your family, protecting your valuable possessions, or just want peace of mind, installing a home security system is a wise decision.
Planning
Before starting the installation, it’s important to have a solid plan in place. Begin by assessing your home’s unique security needs. Take note of vulnerable areas such as doors, windows, and garages that require extra protection. Determine whether you prefer a wired or wireless system and decide on the number and location of security cameras and sensors.
Equipment Selection
Once you have a plan, choose the right equipment for your needs. Consider purchasing a complete home security system kit which includes cameras, sensors, control panels, and a central monitoring station. Ensure that the system you select meets your requirements and budget.
Installation
Now that you have your equipment ready, let’s move on to the installation process. Start by reading the manufacturer’s instructions carefully. Begin with the control panel installation, followed by mounting the cameras and sensors. Remember to consider the optimal positioning of these devices to ensure maximum coverage. Connect the devices to the control panel using the provided cables or wireless connections.
Testing and Troubleshooting
After completing the installation, it’s essential to test your system thoroughly. Activate each sensor, camera, and alarm to ensure they are functioning properly. Test the smartphone app or remote access features to ensure easy monitoring and control. If you encounter any issues, consult the troubleshooting guide provided by the manufacturer or reach out to their customer support for assistance.

Choosing the Right Home Security System
Assessing your home security needs
When it comes to protecting your home and loved ones, installing a reliable home security system should be at the top of your priority list. But with so many options available, how do you choose the right one for your specific needs? The first step is to assess your home security needs.
Take a walk around your property and identify any potential vulnerabilities. Are there dark areas with limited visibility? Are there any points of entry that are more susceptible to break-ins? By understanding your home’s weak points, you can determine which areas need extra security measures.
Researching different types of home security systems
Now that you know what areas of your home require extra protection, it’s time to research the different types of home security systems. From basic DIY systems to more advanced professionally installed systems, there is a wide range of options to choose from.
Consider factors such as ease of installation, monitoring capabilities, and compatibility with other smart home devices. Determine whether you prefer a wired or wireless system, and whether you want one that is self-monitored or professionally monitored.
Considering professional monitoring vs. self-monitoring
When it comes to monitoring your home security system, you have two main options: professional monitoring or self-monitoring. Professional monitoring involves a third-party company keeping an eye on your system and contacting emergency services if necessary. This provides an additional layer of protection as someone is constantly watching over your home.
On the other hand, self-monitoring allows you to keep tabs on your security system through a smartphone app or web portal. This option gives you more control and the ability to respond immediately to any alerts. Consider your lifestyle, budget, and peace of mind when deciding which monitoring option is right for you.
By taking the time to assess your home security needs, researching different types of home security systems, and considering the benefits of professional monitoring versus self-monitoring, you can make an informed decision and choose the best home security system for your peace of mind and the safety of your loved ones. So why wait? Start protecting your home today!

Gathering the Necessary Tools and Equipment
Creating a checklist of required tools and equipment
When it comes to installing a home security system, having the right tools at your disposal is essential. To ensure a smooth installation process, I recommend creating a checklist of all the tools and equipment you will need. This way, you can easily keep track of what you have and what you still need to acquire. Some of the tools you should include on your checklist are a drill, screwdriver, wire cutters, and a ladder. Having a comprehensive list will help you stay organized and avoid any unnecessary trips to the hardware store.
Gathering essential tools such as a drill, screwdriver, and wire cutters
Now that you have your checklist ready, it’s time to gather the essential tools needed for installing a home security system. The first tool you’ll want to have on hand is a drill. This will be necessary for mounting cameras, sensors, and other security system components. A screwdriver is also crucial for attaching wires and securing various parts of the system. Additionally, wire cutters are essential for trimming and connecting cables, ensuring a clean and proper installation.
Collecting the necessary security system components
In addition to the tools mentioned above, it’s important to gather all the necessary security system components. This typically includes cameras, sensors, a control panel, and alarm devices. When collecting these components, be sure to carefully read the manufacturer’s instructions to ensure compatibility and functionality. Take your time to inspect each component and make sure you have all the required cables and connectors.
By creating a checklist, gathering essential tools, and collecting the necessary security system components, you’ll be well-prepared to proceed with the installation process. In the next section, I will guide you through the proper placement of security system components throughout your home. So let’s move on and get closer to having a fully functional home security system in place!

Preparing Your Home for Installation
One of the most effective ways to protect your home and loved ones is by installing a home security system. With the advancement in technology, it has become easy and affordable for anyone to set up their own system without professional help. In this post, I will guide you through the step-by-step process of installing a home security system, ensuring that your home remains safe and secure.
Selecting strategic locations for security equipment
The first step in installing a home security system is to determine the best locations for your security equipment. Start by identifying the high-risk areas such as entry points, windows, and any other vulnerable spots. These areas are usually targeted by intruders, so it’s crucial to have the right equipment in place.
Inspecting and preparing entry points
Once you have identified the key areas, thoroughly inspect the entry points such as doors and windows. Make sure they are in good condition and properly secured. Reinforce weak spots, such as flimsy doors or outdated locks, to ensure maximum protection. This is also a good time to consider adding additional security measures such as deadbolts or door alarms.
Checking for existing wiring or potential obstacles
Before proceeding with the installation, check if your home already has existing wiring that can be utilized for your security system. This will save you time and effort in running new wires. Additionally, take note of any potential obstacles that may interfere with the installation process, such as furniture or wall fixtures. Clearing these obstacles will make the installation easier and more efficient.
By following these easy step-by-step instructions and taking the time to prepare your home for installation, you can ensure that your home security system is set up effectively. Once complete, you can have peace of mind knowing that you are taking proactive measures to protect your home and loved ones.
Installing Door and Window Sensors
Determining the best placement for sensors
Installing door and window sensors is a crucial step in setting up your home security system. These sensors play a vital role in detecting unauthorized entry and triggering the alarm, ensuring the safety of your family and valuable possessions. To start, take a moment to consider the strategic locations for these sensors.
When it comes to doors, it’s important to place sensors on both the front and back entrances of your home. Additionally, don’t forget about any side doors or basement entrances that may provide an access point for intruders. As for windows, prioritize those on the ground floor and any other easily accessible ones.
Drilling holes for sensor brackets
Once you have determined the best placement for your sensors, it’s time to drill holes for the sensor brackets. Make sure to choose a drill bit that matches the size of the holes specified in the sensor instructions.
Start by positioning the sensor bracket against the door or window frame. Hold it firmly, and use a pencil or marker to mark the points where the holes need to be drilled. Double-check the alignment to ensure that the sensor will be securely attached.
Next, carefully drill the holes according to the marked points. Take your time and ensure the drill is straight. Make sure to remove any debris from the holes before proceeding to the next step.
Attaching sensors and testing their functionality
With the brackets securely in place, it’s time to attach the sensors. Simply align the sensor with the bracket and slide it into position. You should hear a satisfying click, indicating that the sensor is securely locked into place.
After attaching all the sensors, it’s crucial to test their functionality. Arm the security system and open each protected door and window. The alarm should sound immediately, indicating that the sensors are functioning correctly.
installing door and window sensors for your home security system requires careful consideration of their placement, drilling holes for the sensor brackets, and attaching the sensors properly. By following these easy steps, you can enhance the security of your home and gain peace of mind.
Mounting Security Cameras
Installing security cameras is a crucial step in setting up your home security system. Not only do they act as a deterrent, but they also provide crucial evidence in case of any suspicious activity. In this section, I will guide you through the process of mounting your security cameras to ensure maximum coverage and effectiveness.
Choosing ideal locations for camera placement
Before installing your cameras, it is essential to identify the areas that require monitoring. Look for vulnerable entry points such as doors, windows, and garages, as well as any blind spots. Ensure that the cameras have a clear line of sight to capture any potential intruders. Additionally, consider the range of each camera and position them accordingly to cover the desired areas effectively.
Installing camera mounting brackets
Once you have determined the ideal locations for your security cameras, it’s time to install the camera mounting brackets. Start by using a stud finder to locate the studs in the wall or ceiling where you plan to mount the cameras. Once located, mark the positions where the brackets will be attached. Using a drill, create pilot holes and secure the brackets in place using appropriate screws. Make sure the brackets are sturdy and can hold the weight of the cameras.
Securing cameras and adjusting their angles
With the mounting brackets in place, it’s time to attach the cameras and adjust their angles. Each camera should be securely fastened to its corresponding bracket using the provided screws or mounting hardware. Once attached, use the adjustable joints on the brackets to position the cameras at the desired angles for optimal coverage. Test different angles to find the sweet spot where you can capture the maximum area without any obstructions.
By following these easy step-by-step instructions for mounting security cameras, you can ensure that your home security system is properly set up for effective monitoring and protection. Remember to regularly check the positioning and angles of the cameras to ensure they continue to provide the best coverage possible. With a well-placed and properly installed home security system, you can have peace of mind knowing that your home and loved ones are safe and secure.

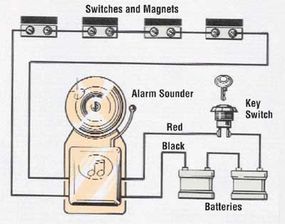
Connecting Control Panel and Keypad
Installing a home security system may seem like a daunting task, but with these easy step-by-step instructions, you’ll be able to set up your own system and give yourself peace of mind. In this section, I will guide you through the process of connecting the control panel and keypad, ensuring that your security system is up and running smoothly.
Locating a central spot for the control panel
First, you’ll need to find a suitable location for your control panel. Choose a central spot in your home, such as near the main entrance or in a hallway, where it is easily accessible for arming and disarming the system. Keep in mind that the control panel should be placed away from direct sunlight or extreme temperatures to avoid any interference or damage.
Mounting the control panel and connecting power
Once you’ve found the perfect spot, it’s time to mount the control panel. Use the included screws or adhesive strips to securely mount it on the wall. Ensure that it is at a comfortable height for easy viewing and access. Next, connect the power supply to the control panel, either plugging it into a nearby outlet or wiring it directly.
Connecting the keypad and testing system activation
Now that the control panel is in place, it’s time to connect the keypad. Connect the provided cables to the designated ports on both the control panel and keypad. Ensure that the connections are secure and tight. Once connected, power up the control panel and keypad by turning on the main power switch.
To verify that the system is activated and functioning correctly, test the keypad by keying in the system’s default code. If the system activates and disarms as expected, congratulations! You’ve successfully connected the control panel and keypad.
By following these simple instructions, you can easily connect the control panel and keypad of your new home security system. In the next section, we will cover the installation of sensors and detectors, bringing you one step closer to a secure and protected home.
Running and Hiding Wires
Planning wire routes to maintain a tidy appearance
When it comes to installing a home security system, one of the most important aspects is running and hiding the wires. Not only does this ensure that your system remains functional and organized, but it also helps maintain the aesthetic appeal of your home. To achieve this, careful planning of wire routes is essential.
Start by assessing your home’s layout and identifying the best paths for your wires. Consider areas that are less visible, such as behind furniture or along baseboards. By strategically planning the wire routes, you can minimize their visibility and create a neat and tidy appearance.
Drilling holes for wire concealment
To effectively hide your security system’s wires, you will need to drill holes in certain areas of your home. These holes should be strategically placed in inconspicuous locations to ensure that the wires remain hidden from view. Before drilling, it is crucial to locate any potential obstructions, such as electrical wires or plumbing pipes, to avoid damaging them.
Once you have identified suitable locations for drilling, carefully measure and mark the spots. Use an appropriate drill bit size for your wires and make sure to drill straight and clean holes. After drilling, thread the wires through the holes, ensuring a snug fit to prevent any slack or bulges.
Securing wires and concealing them using cable clips
To further enhance the neat appearance of your home security system, it is important to secure and conceal the wires. One effective method is to use cable clips. These adhesive or screw-mounted clips can be easily attached to walls or baseboards, holding the wires securely in place while keeping them out of sight.
Carefully route the wires along the planned paths and use the cable clips to secure them at regular intervals. Make sure to apply the clips discreetly, avoiding noticeable areas or direct lines of sight. By doing so, you can create a seamless and professional-looking installation.
With these steps, you can confidently run and hide the wires of your home security system, ensuring a tidy and inconspicuous installation. Remember to plan your wire routes carefully, drill holes strategically, and use cable clips for secure wire concealment. By taking the time to follow these steps, you can enjoy the peace of mind and added security that comes with a professionally installed home security system.
Setting Up Remote Access and Alerts
One of the key features of a home security system is the ability to remotely access and receive alerts about the status of your home. In this section, I will walk you through the process of setting up remote access and configuring alerts on your home security system.
Configuring the Security System with Wi-Fi Network
Before you can enable remote access and alerts, you need to connect your home security system to your Wi-Fi network. Start by locating the Wi-Fi settings on your security system control panel. Using the provided instructions, enter your Wi-Fi network name and password. Once connected, you can test the connection by opening a web browser on your computer or mobile device.
Setting Up Remote Access via a Mobile App or Web Portal
To access your security system remotely, you will need to download the mobile app or log in to the web portal provided by the manufacturer. Simply search for the app in your device’s app store or visit the manufacturer’s website to log in. Follow the on-screen instructions to create an account and link your security system. Once set up, you will be able to access real-time video feeds, control settings, and receive alerts from anywhere using your smartphone or computer.
Enabling Alerts and Notifications for any Security Breaches
To ensure you are promptly alerted in the event of a security breach, it is important to enable alerts and notifications on your home security system. This can typically be done through the mobile app or web portal. Look for the settings menu and locate the notifications section. From there, you can choose the types of alerts you would like to receive, such as motion detection, door/window openings, or even smoke and carbon monoxide detection. Customize these settings to suit your preferences and security needs.
With remote access and alerts set up, you can have peace of mind knowing that you can monitor your home from anywhere and receive instant notifications in the event of any security breaches. Follow these easy steps, and you’ll have your home security system up and running in no time. Stay safe!
Testing and Troubleshooting the System
Conducting comprehensive system tests
Once you have completed the installation of your home security system, it is important to conduct comprehensive tests to ensure that every component is functioning properly. This will give you peace of mind knowing that your system is ready to protect your home and loved ones.
To begin the testing process, arm your security system and walk through each zone to trigger the sensors. This will allow you to verify that the sensors are properly detecting any movement or activity within their designated areas. Pay close attention to any false alarms or areas that are not being properly covered. If you notice any issues, make the necessary adjustments to ensure proper functionality.
Next, test the cameras by reviewing the recorded footage and checking the live feed. Ensure that the cameras are capturing clear and high-quality video, both during the day and at night. Check for any blind spots or areas that may need additional camera coverage. If any issues arise, reposition the cameras accordingly.
Verifying proper functioning of sensors, cameras, and alarms
In addition to conducting zone tests, it is crucial to verify the proper functioning of the sensors, cameras, and alarms. Test each individual sensor by triggering them manually and verifying that they activate the alarm system. This includes the window and door sensors, motion detectors, and glass break sensors.
For the cameras, make sure they are capturing footage and transmitting it to your designated recording device or cloud storage. Check the positioning of the cameras to ensure they provide clear coverage of the desired areas.
Finally, test the alarms by activating the system and verifying that the alarms sound properly. If you have integrated your system with a monitoring service, make sure they receive the alarm signals promptly and respond accordingly.
Troubleshooting common installation issues
In the event that you encounter any issues during the testing process, it is important to troubleshoot and resolve them promptly. For common installation issues such as false alarms, poor camera quality, or malfunctioning sensors, refer to the manufacturer’s instructions or contact their customer support for assistance.
If you are unable to troubleshoot the issues on your own, consider seeking professional help. Many home security companies offer technical support services to help you diagnose and resolve any problems with your system.
By thoroughly testing and troubleshooting your home security system, you can ensure that it is functioning optimally and providing the level of protection you desire. Take the time to address any issues that arise, as your home security system is only as effective as its components’ proper functioning. With a properly installed and tested system, you can have peace of mind knowing that your home is safe and secure.
Securing and Documenting System Details
When it comes to installing a home security system, one of the first steps is to secure and document all the important details. This ensures that you have all the necessary information at your fingertips, making it easier to manage and troubleshoot your system in the future. In this section, I will guide you through the process of securing the control panel and system documentation, creating backup codes and passwords, and noting emergency contact information and service provider details.
Securing the Control Panel and System Documentation
The control panel is the brain of your home security system, so it’s crucial to keep it secure. Find a centralized and discreet location to mount it, such as a closet or utility room. Make sure the panel is not easily accessible to intruders, but still convenient for you to access in case of emergencies.
Additionally, it’s important to keep all the system documentation in a safe place. This includes user manuals, warranty information, and any other important paperwork that comes with your security system. Consider organizing them in a labeled folder or binder, keeping everything together and easily accessible whenever you need it.
Creating Backup Codes and Passwords
To ensure the integrity and security of your home security system, it’s essential to create backup codes and passwords. These act as extra layers of protection, preventing unauthorized access to your system. Follow the manufacturer’s instructions on how to set up these codes and passwords, and make sure to choose strong and unique combinations. Keep track of them in a secure location, such as a password manager or a locked drawer, and avoid writing them down where they could be easily discovered.
Noting Emergency Contact Information and Service Provider Details
In case of a security breach or an emergency, it’s important to have all the necessary contact information readily available. Note down the phone numbers of your local police department, fire department, and any other relevant emergency services. Additionally, keep a record of your security system’s service provider, including their contact information and any account numbers or reference codes you may need when contacting them for support or maintenance.
By securely securing and documenting the important details of your home security system, you can ensure its effectiveness and have peace of mind knowing that you are prepared for any situation that may arise.
Conclusion
Take Control of Your Home Security
Installing a home security system may seem like a daunting task, but with these easy step-by-step instructions, you can have peace of mind in no time. By following these simple guidelines, you will be able to enhance the security of your home and protect your loved ones and belongings.
The Importance of Proper Installation
A home security system is only as effective as its installation. Proper placement of sensors, cameras, and control panels is crucial for optimal coverage and functionality. By carefully following the steps outlined in this guide, you will ensure that your system is installed correctly, maximizing its effectiveness in deterring potential burglars and monitoring your property.
Gathering Your Tools and Equipment
Before beginning the installation process, it is important to gather all the necessary tools and equipment. This includes a drill, a screwdriver, mounting brackets, cables, and any additional sensors or cameras you may have purchased. Having everything on hand will make the installation process smoother and more efficient.
Step-by-Step Installation Instructions
Following the step-by-step instructions provided, you will be guided through each stage of the installation process. From setting up the control panel to mounting sensors and cameras, every detail is explained in clear and concise terms. Take your time and carefully follow each instruction to ensure a smooth installation.
Once your home security system is installed, it is important to test and troubleshoot it to ensure it is functioning properly. This includes checking that all sensors are working, cameras are providing clear visuals, and the control panel is communicating with the monitoring station. We provide detailed instructions on how to carry out these tests and troubleshoot any issues that may arise.
In Conclusion
Installing a home security system can greatly improve the safety and security of your home. By following our easy step-by-step instructions and taking the time to properly install and test your system, you can have peace of mind knowing that your loved ones and belongings are protected. Don’t wait any longer – take control of your home security today.