So you have a sweet tooth and an adventurous spirit, and you’ve always dreamt of creating your own delectable chocolates at home. Well, get ready to bring your culinary dreams to life! In this article, we’ll guide you through the step-by-step process of making homemade chocolates that are not only incredibly delicious but also customizable to suit your unique taste buds. From choosing the perfect chocolate base to experimenting with various fillings and toppings, get ready to become a chocolatier in the comfort of your own kitchen!
Choosing the Right Chocolate
When it comes to making homemade chocolates, choosing the right chocolate is the first and most important step. There are different types of chocolate available, such as dark chocolate, milk chocolate, and white chocolate. Each type of chocolate has its unique flavor profile, so it’s important to select one that suits your taste preferences.
Dark chocolate is known for its rich and intense flavor, with a higher percentage of cocoa solids. It pairs well with a variety of flavors and is often used in gourmet chocolates. On the other hand, milk chocolate has a smoother and sweeter taste, making it a popular choice for people who enjoy milder chocolate flavors. White chocolate, although technically not chocolate due to the absence of cocoa solids, has a creamy and sweet flavor that can be a great addition to certain recipes.
When choosing chocolate, it’s also important to consider the quality. High-quality chocolate typically contains a higher percentage of cocoa solids, which results in a richer flavor. Look for chocolate with a cocoa percentage of at least 60% for a more intense taste. Additionally, opt for chocolate that is made from premium cocoa beans and has minimal additives or preservatives.
Lastly, flavored chocolate can add an extra dimension to your homemade chocolates. You can find a wide range of flavored chocolate options, such as mint, caramel, or fruit-infused varieties. Experiment with different flavors to find the ones that complement your chosen fillings and textures.
Essential Equipment and Ingredients
Once you have chosen the right chocolate, it’s time to gather the essential equipment and ingredients for your chocolate-making adventure. Here are some key items you will need:
Chocolate
Naturally, chocolate is a crucial component when it comes to making chocolates at home. Ensure you have enough high-quality chocolate for your recipes. You can choose between chocolate bars or chocolate chips, depending on your preference. If using bars, make sure to chop them into smaller pieces for easier melting.
Sweeteners
Sweeteners are an important ingredient to balance out the bitterness of the chocolate. Common sweeteners used in chocolate-making include granulated sugar, powdered sugar, and honey. The type and amount of sweetener you use will depend on the specific recipe and your personal taste preferences.
Flavorings
To enhance the taste of your chocolates, consider adding flavorings such as vanilla extract, almond extract, or citrus zest. These flavorings can add a delightful twist to your homemade chocolates and make them more unique and delicious.
Butters and Oils
Butters and oils are often used to create a smoother and creamier texture in chocolates. You can use ingredients like butter, coconut oil, or vegetable oil to achieve this. Be sure to use a small amount of these ingredients to avoid overpowering the chocolate flavor.
Nuts and Fruits
Nuts and fruits can add a delightful crunch and burst of flavor to your homemade chocolates. Consider using ingredients like almonds, pistachios, dried cranberries, or cherries as mix-ins. Chop them into small pieces for easier incorporation into the chocolate.
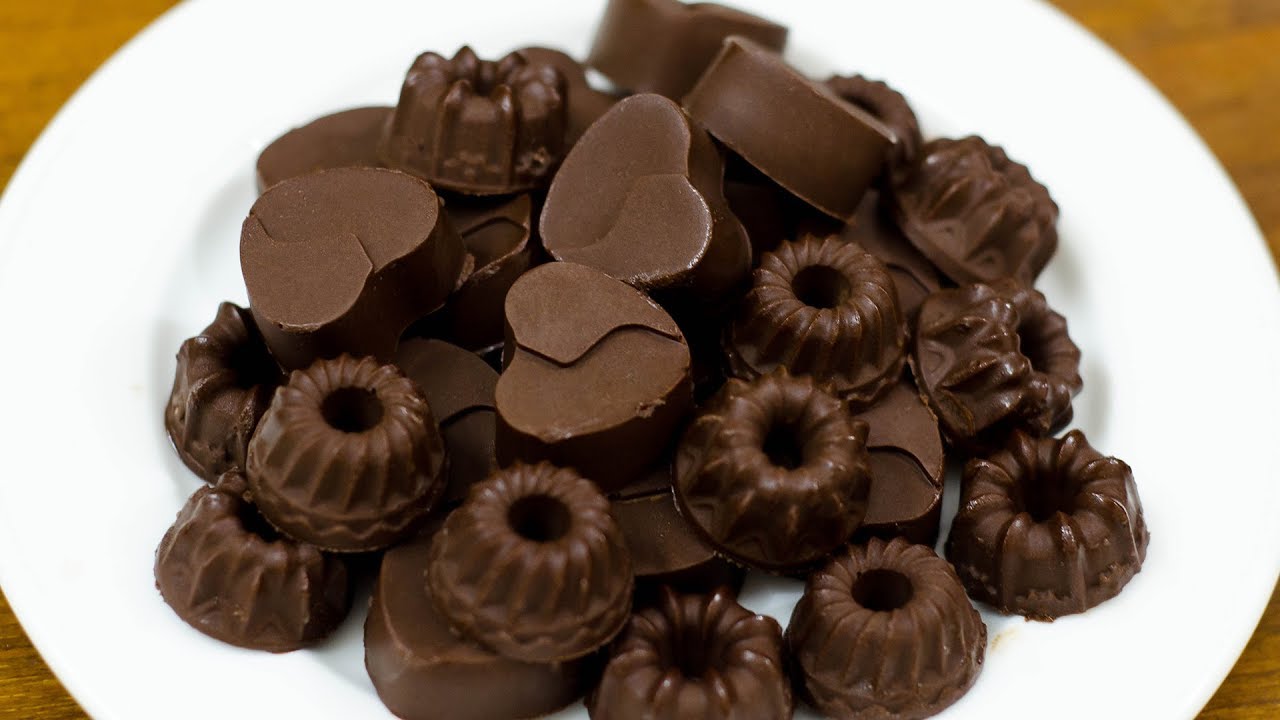
Molds and Tools
Having the right molds and tools is essential for shaping and decorating your chocolates. Silicone molds are readily available and easy to work with, allowing you to create professional-looking chocolates at home. Additionally, gather tools like a spatula, a candy thermometer, and a chocolate scraper to assist you during the chocolate-making process.

Preparing the Chocolate
Before you begin creating your homemade chocolates, you need to know how to properly prepare the chocolate. This involves tempering the chocolate, melting it to the desired consistency, and adding any additional flavors or sweeteners.
Tempering the Chocolate
Tempering is the process of heating and cooling chocolate to stabilize it and achieve a glossy, smooth texture. This step is crucial to ensure that your chocolates have a professional appearance and a smooth mouthfeel.
To temper chocolate, you will need to melt it gently, either using a double boiler or the microwave. Once melted, allow the chocolate to cool slightly, and then reheat it in short intervals until it reaches the desired temperature. Use a candy thermometer to monitor the temperature and ensure you stay within the proper tempering range.
Melting the Chocolate
If your recipe doesn’t require tempered chocolate, you can simply melt it to a smooth consistency. This can be done by using a double boiler or the microwave. When melting chocolate, it’s important to do so slowly and gently to avoid scorching or burning it. Stir the chocolate occasionally to ensure even melting and a smooth texture.
Adding Flavors and Sweeteners
After tempering or melting the chocolate, you can add additional flavors and sweeteners to enhance the taste of your chocolates. This can include adding things like vanilla extract, almond extract, or sweeteners like powdered sugar or honey. Remember to add these ingredients in small amounts, tasting as you go, to ensure the flavors are balanced and not overpowering.
Creating the Chocolate Center
The chocolate center is the heart of a filled chocolate. It can be made in various flavors and textures, depending on your preference. Here’s how to create a delicious chocolate center:
Choosing Center Fillings
When choosing center fillings, consider flavors that pair well with chocolate and complement your chosen chocolate type. Popular options include caramel, peanut butter, fruit jams, or even cookie dough. Think about the textures you want in your centers as well, as some fillings may be creamy, crispy, or chewy.
Preparation of Center Fillings
To prepare the center fillings, gather the necessary ingredients and follow the recipe instructions. This can involve cooking ingredients like sugar and cream to create caramel or mixing together various ingredients to make a creamy ganache. When making the centers, take care to follow the instructions closely to achieve the desired consistency and flavor.
Shaping and Dipping the Centers
Once your center fillings are prepared, it’s time to shape them and dip them in the melted chocolate. Depending on the type of center, you may need to roll the fillings into small balls, spread them into molds, or create small discs or squares. Ensure that the centers are properly chilled or set before dipping them into the melted chocolate.
To dip the centers, use a fork or a dipping tool to submerge them into the melted chocolate, ensuring they are fully coated. Allow any excess chocolate to drip off before placing them on a lined baking sheet or a silicone mat. Let the chocolates set at room temperature or in the refrigerator until the chocolate coating is firm and glossy.

Making Filled Chocolates
Filled chocolates are a true delight, with a surprise burst of flavor and texture in every bite. Here’s how to make them:
Choosing the Filling
When making filled chocolates, the filling plays a crucial role in determining the taste and texture of the final product. Consider using a variety of fillings such as caramel, nut butter, fruit puree, or even a combination of different flavors. Experiment with different fillings to find the ones that resonate with your preferences.
Preparing the Filling
To prepare the filling, gather the necessary ingredients and follow the recipe instructions. This can involve cooking ingredients together, mixing them, or using prepared fillings like jams or spreads. Take your time to ensure that the filling is well-incorporated and has a smooth and consistent texture.
Filling the Chocolate Molds
Once your fillings are prepared, it’s time to fill the chocolate molds. Start by brushing or spreading a thin layer of melted chocolate inside the molds using a small spoon or a pastry brush. This helps create a barrier between the filling and the outer chocolate layer. Allow this layer to set before adding the filling.
Next, spoon or pipe the prepared filling into the molds, ensuring you don’t overfill them. Leave a small space at the top to allow for the final layer of chocolate. Once the molds are filled, gently tap them on the counter to release any air bubbles and level out the filling.
Lastly, pour or spoon melted chocolate over the filling, ensuring it covers the entire surface. Use a spatula or scraper to remove any excess chocolate and create a smooth, even top. Allow the filled chocolates to set at room temperature or in the refrigerator until the chocolate is firm.
Adding Textures to Chocolates
Adding textures to your chocolates can take them to the next level of deliciousness. Here are some ways to incorporate different textures into your homemade chocolates:
Using Nuts and Fruits
Nuts and fruits are excellent options for adding crunchy or chewy textures to your chocolates. Chop nuts like almonds, hazelnuts, or macadamia nuts into small pieces and mix them into your melted chocolate before pouring into molds or coating fillings. Dried fruits like cranberries, cherries, or apricots can also be chopped and added for a burst of fruity flavor and chewiness.
Crispy, Creamy, or Chewy Textures
To create crispy textures, consider adding ingredients like rice cereal, crushed cookies, or puffed grains to your chocolate. These will add a delightful snap and crunch in every bite. For a creamy texture, incorporate ingredients like cream cheese, peanut butter, or nut butters into your fillings. Chewy textures can be achieved by using caramel, marshmallows, or nougat-like fillings.
Decorative Toppings and Drizzles
Decorative toppings and drizzles can add visual appeal and texture to your chocolates. Consider sprinkling chopped nuts or dried fruit on top of the melted chocolate before it sets. You can also drizzle contrasting melted chocolate or caramel over the top to create an attractive pattern. Get creative with your toppings and drizzles to make your homemade chocolates look as good as they taste.

Creating Flavored Chocolates
If you want to experiment with different flavors in your homemade chocolates, creating flavored chocolates is the way to go. Here are some ideas to get you started:
Infused Flavors
Infusing flavors into your chocolate can add depth and complexity to the taste. Consider infusing ingredients like coffee beans, vanilla pods, or herbs into melted chocolate. Heat the chocolate gently with the desired infusion ingredient, allowing the flavors to meld together. Strain out any solids before using the infused chocolate in your recipes.
Spices and Herbs
Spices and herbs can elevate the flavor profile of your chocolates and create unique culinary experiences. Consider incorporating ingredients like cinnamon, chili powder, mint leaves, or lavender into your melted chocolate. Begin with small amounts and taste as you go, adjusting the flavor until you achieve the desired taste.
Alcohol-infused Chocolates
Alcohol-infused chocolates can be a delightful treat for adults. Choose flavors that pair well with chocolate, such as rum, bourbon, or liqueurs like amaretto or Grand Marnier. When incorporating alcohol into your melted chocolate or fillings, do so sparingly to avoid adding too much liquid, which can affect the texture and consistency of the chocolates.
Decorating and Garnishing Chocolates
To make your homemade chocolates look as enticing as possible, take some time to decorate and garnish them. Here are some ideas to inspire you:
Using Colored Chocolates
Colored chocolates can add a vibrant and eye-catching element to your creations. Purchase food-grade edible coloring specifically made for use with chocolate. Mix and match different colors to create visually appealing patterns or use them to paint designs on the outside of your chocolates.
Edible Gold and Silver
For an extra touch of luxury and elegance, consider decorating your chocolates with edible gold or silver leaf. These delicate, thin sheets can be carefully applied to the surface of your chocolates to create a stunning metallic effect. Use a small, soft brush to apply the leaf gently and with precision.
Sprinkles and Decorative Pieces
Sprinkles and decorative pieces can add fun and personality to your homemade chocolates. Choose colorful sprinkles, edible pearls, or even small candies to sprinkle on top of your chocolates before the chocolate sets. You can also use edible markers to draw intricate designs or write personalized messages on the chocolate surface.

Storing and Packaging Your Homemade Chocolates
Properly storing and packaging your homemade chocolates is crucial to maintain their freshness and quality. Here are some guidelines to follow:
Storage Guidelines
To ensure your homemade chocolates stay fresh, store them in an airtight container in a cool, dry place away from direct sunlight. Avoid storing them in the refrigerator, as the moisture can cause the chocolate to develop white spots called blooming. If your chocolates contain fresh or perishable ingredients, such as fruits or cream, they should be refrigerated and consumed within a shorter period of time.
Packaging Ideas
Packaging your homemade chocolates in an appealing and thoughtful way can make them even more special. Consider using decorative boxes, tins, or jars to hold your chocolates. You can also wrap them individually in foil or colored cellophane and tie them with ribbons or twine for an elegant touch. Personalize the packaging with labels, stickers, or handwritten notes for an extra special touch.
Gift Wrapping Tips
If you plan to give your homemade chocolates as gifts, presentation is key. Consider layering the chocolates in tissue paper or small cups inside the packaging to prevent them from moving around and getting damaged. Add some decorative elements like fresh flowers, a personalized card, or a bow to create a beautiful and memorable gift.
Troubleshooting Common Chocolate Making Issues
Even the most experienced chocolatiers encounter problems occasionally. Here are some common chocolate-making issues and how to troubleshoot them:
Chocolate Seizing
Chocolate can seize or become stiff and grainy when exposed to even small amounts of liquid. To fix seized chocolate, remove it from heat immediately and add a small amount of vegetable oil or melted cocoa butter. Stir gently until the chocolate becomes smooth and workable again.
Chocolate Blooming
Blooming occurs when chocolate turns dull or develops white streaks on the surface due to temperature changes or excess moisture. While bloomed chocolate is still safe to eat, it may not have the same texture and appearance. To prevent blooming, store your chocolates in a cool, dry place away from humidity and temperature fluctuations.
Preventing Cracks
Cracks can occur on the surface of your chocolates if the chocolate is not tempered properly or the filling expands during cooling. To prevent cracks, ensure that your chocolates are properly tempered or melted before filling. Additionally, make sure the fillings are fully chilled before dipping or molding them, as this can help minimize the likelihood of cracking.
By following these tips and guidelines, you’ll be well on your way to creating delicious homemade chocolates that look and taste amazing. Experiment with different flavors, fillings, and textures to discover your own signature recipes. With practice and a little creativity, you’ll impress family and friends with your delectable homemade chocolates. Enjoy the journey, and savor every bite!
