So, you’ve got a hankering for some delectable chocolates, but you don’t want to leave the comfort of your own home? Well, you’re in luck because I’ve got the inside scoop on how to make your very own mouthwatering chocolates right in your own kitchen. No need for fancy equipment or culinary expertise – with a few simple ingredients and some easy-to-follow steps, you’ll be indulging in delicious homemade chocolates in no time. Get ready to impress your friends and family with your newfound chocolatier skills!
1. Choosing the Right Ingredients
When it comes to making your own chocolates, choosing the right ingredients is crucial to achieving a delicious end result. High-quality chocolate is the foundation of any great chocolate creation.
1.1 Selecting High-Quality Chocolate
When selecting chocolate for your homemade treats, opt for chocolate with a high cocoa content. Cocoa is the key ingredient that gives chocolate its rich and intense flavor. Look for chocolate bars or couverture that are labeled as dark, semi-sweet, or bittersweet, as these tend to have higher cocoa content compared to milk chocolate.
It’s also important to consider the quality of the chocolate. Choose reputable brands that are known for their quality and craftsmanship. These brands often source their cocoa beans from specific regions, resulting in unique flavor profiles and superior quality.
1.2 Choosing Additional Ingredients
While the chocolate itself is the star of the show, additional ingredients can help enhance the flavor and texture of your homemade chocolates. Consider adding ingredients like nuts, dried fruit, spices, or even flavored extracts to add a unique twist to your creations.
When selecting additional ingredients, ensure they are fresh and of high quality. For nuts, choose varieties that are raw or lightly toasted to maintain their crunchiness. Dried fruit should be plump and juicy, and spices should be fragrant and free from any clumps. Experiment with different combinations of ingredients to discover your own signature chocolates.
2. Essential Chocolate-Making Equipment
To successfully make your own chocolates at home, you’ll need a few essential tools and equipment to help you along the way.
2.1 Chocolate Thermometer
A chocolate thermometer is a must-have tool for tempering chocolate. Tempering is the process of heating and cooling chocolate to specific temperatures, resulting in a glossy and stable finished product. A chocolate thermometer allows you to accurately measure the temperature and achieve the desired tempering results.
2.2 Double Boiler
A double boiler is an essential tool for melting chocolate without the risk of burning or overheating. It consists of two pots, where the larger pot is filled with water and the smaller pot sits on top, holding the chocolate. The steam from the simmering water gently heats the chocolate, ensuring a smooth and even melt.
2.3 Silicone Molds
Silicone molds are excellent for creating beautifully shaped chocolates with intricate designs. They are flexible and non-stick, making it easy to remove the chocolates once they are set. Silicone molds come in various shapes and sizes, allowing you to get creative with your chocolate creations.
2.4 Piping Bags
Piping bags are useful for filling molded chocolates, creating decorative designs, and even portioning out truffles. They allow for precise control, making it easier to fill the molds or pipe intricate patterns onto your chocolates. Look for sturdy, reusable piping bags for long-lasting use.
2.5 Offset Spatula
An offset spatula is a versatile tool that comes in handy during the chocolate-making process. It’s great for spreading melted chocolate into molds, smoothing out the surface of filled chocolates, and even creating decorative patterns. Invest in a high-quality offset spatula for precise and effortless chocolate work.

3. Melting and Tempering Chocolate
Melting and tempering chocolate is a crucial step in the chocolate-making process. It ensures that the chocolate has a smooth texture, glossy appearance, and a pleasant snap.
3.1 Melting Chocolate
To melt chocolate, start by finely chopping it into small and uniform pieces. This will help it melt more evenly. Place the chopped chocolate into a heatproof bowl and set it over a double boiler. Heat the water in the double boiler over low heat and stir the chocolate occasionally until it is fully melted and smooth.
Alternatively, you can also melt chocolate in the microwave. Place the finely chopped chocolate in a microwave-safe bowl and microwave it in short bursts of 20-30 seconds, stirring in between each interval, until melted and smooth.
3.2 Tempering Chocolate
Tempering chocolate is necessary to achieve a stable and shiny finish. To temper chocolate, start by melting the chocolate until it reaches its melting point. Then, cool the chocolate by stirring it continuously until it reaches the ideal temperature for tempering. This is usually around 31-32°C (88-90°F) for dark chocolate and 29-30°C (84-86°F) for milk or white chocolate.
Once the chocolate has reached the ideal temperature, reheat it slightly to remove any remaining crystals. This is known as “seeding” and can be done by adding small pieces of unmelted chocolate to the melted chocolate and stirring until fully melted. This process helps to create a stable crystal structure in the chocolate, resulting in a glossy and well-tempered finish.
4. Adding Fillings and Flavors
Adding fillings and flavors to your homemade chocolates can take them to the next level, offering a delightful surprise with every bite.
4.1 Filling Options
The possibilities for fillings in homemade chocolates are endless. Some popular options include creamy ganaches, fruity caramels, nut pralines, or even liqueur-infused centers. When creating filled chocolates, ensure that the filling complements the chocolate and maintains the right balance of flavors.
To fill molded chocolates, simply spoon or pipe a small amount of filling into each mold cavity, leaving enough room to seal the top with more melted chocolate. Allow the filling to set before adding the final layer of chocolate.
4.2 Flavoring Options
Flavors can be added to chocolates in various ways. For a subtle touch, consider infusing the chocolate with herbs or spices. Simply heat a small amount of cream or milk and steep the desired ingredient before adding it to the melted chocolate. This will infuse the chocolate with delicate flavors.
Another option is to use flavored extracts or oils to enhance the taste of your chocolates. These extracts come in a wide range of flavors, from classic vanilla to unique options like lavender or coffee. Experiment with different flavor combinations and find your personal favorites.

5. Molding and Shaping Chocolates
Molding and shaping chocolates allows you to create visually stunning and professionally crafted treats.
5.1 Using Silicone Molds
Silicone molds are ideal for creating perfectly shaped chocolates. Start by filling each mold cavity with your melted and tempered chocolate, ensuring that it covers the entire surface. Use an offset spatula to scrape off any excess chocolate and create a smooth finish. Once the molds are filled, gently tap them on the countertop to remove any air bubbles. Let the chocolates set completely before removing them from the molds.
5.2 Hand-Rolling Truffles
Truffles are a classic and decadent chocolate treat. To create truffles, start by chilling your ganache or filling until it’s firm enough to handle. Then, use a small spoon or melon baller to portion out small amounts of the mixture. Roll each portion between your palms to form smooth and round truffles. For added visual appeal, you can roll the truffles in cocoa powder, powdered sugar, or finely chopped nuts.
5.3 Piping Designs
Piping designs onto your chocolates allows for creative customization and adds a touch of elegance. Fill a piping bag fitted with a small round tip with melted chocolate. Gently squeeze the bag to pipe intricate patterns, such as swirls, hearts, or letters, onto your chocolates. Practice on a parchment paper before piping directly onto the chocolates for better control.
6. Decorating and Garnishing
Decorating and garnishing your homemade chocolates adds visual appeal and makes them even more enticing.
6.1 Drizzling with Chocolate
Drizzling melted chocolate over your chocolates can create a beautiful and artistic effect. Fill a piping bag with melted chocolate and snip a small hole in the tip. Hold the bag above the chocolates and gently squeeze, moving your hand in a zigzag motion to create thin lines of chocolate. Allow the drizzled chocolate to set before serving or packaging.
6.2 Dusting with Cocoa Powder or Confectioners’ Sugar
Dusting your chocolates with cocoa powder or confectioners’ sugar can add an elegant and finished touch. To achieve this, place the cocoa powder or sugar in a fine-mesh sieve and lightly tap it over the chocolates. The fine powder will evenly coat the surface, creating a beautiful contrast against the chocolate.
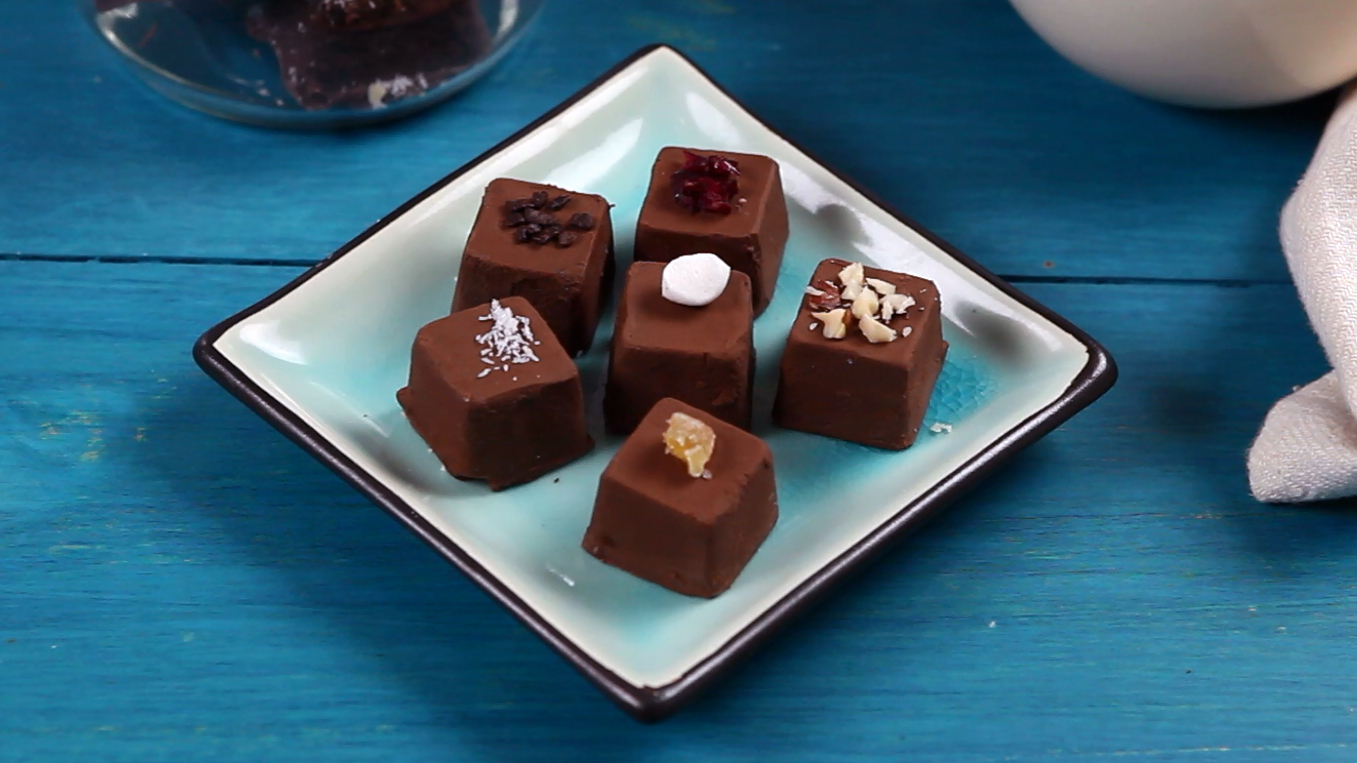
6.3 Adding Nuts or Sprinkles
For an extra burst of texture and flavor, consider adding nuts or sprinkles to your chocolates. Finely chop your favorite nuts and press them gently onto the surface of your chocolates, using melted chocolate as glue. You can also add colorful sprinkles or edible glitter to create a festive and fun look.

7. Cooling and Setting Chocolates
Cooling and setting chocolates properly is essential to achieve the perfect texture and appearance.
7.1 Proper Cooling Techniques
After shaping or filling your chocolates, it’s important to allow them to cool and set at the right temperature. Place the chocolates in a cool, dry place, away from direct sunlight or heat sources. Avoid refrigerating them as it may cause condensation and affect the texture and appearance of the chocolates.
7.2 Setting Time
The setting time of chocolates can vary depending on the size and thickness of the treats, as well as the ambient temperature. Generally, smaller chocolates will set faster than larger ones. Allow your chocolates to set undisturbed for at least a few hours or overnight until they are firm to the touch.
8. Storing Homemade Chocolates
Proper storage is crucial to maintain the freshness and quality of your homemade chocolates.
8.1 Proper Storage Containers
To store your chocolates, choose airtight containers or food-safe boxes that are designed specifically for chocolate. Ensure that the containers are clean and dry before placing the chocolates inside. Separating different flavors or varieties with parchment paper or wax paper can help prevent flavor transfer.
8.2 Ideal Storage Conditions
Chocolates are best stored in a cool and dry place, away from direct sunlight or heat sources. The ideal temperature for storing chocolates is around 18-20°C (64-68°F), with low humidity. Avoid placing them in the refrigerator, as this can lead to moisture absorption and potential condensation.

9. Troubleshooting Common Issues
Despite your best efforts, issues can arise during the chocolate-making process. Here are some common problems and how to troubleshoot them.
9.1 Chocolate Seizing
Chocolate is prone to seizing, which occurs when it comes into contact with even the smallest amount of moisture. If your chocolate seizes, remove it from the heat immediately and set it aside. The seized chocolate cannot be saved, but you can repurpose it by using it in recipes like brownies or hot chocolate.
To prevent seizing, ensure that all equipment and utensils are completely dry before coming into contact with the chocolate. Additionally, avoid adding any liquid-based ingredients directly to the chocolate.
9.2 Chocolate Blooming
Chocolate blooming refers to the appearance of white streaks or spots on the surface of the chocolate. This is caused by changes in temperature or humidity and is not harmful to consume. There are two types of chocolate blooming: fat bloom and sugar bloom.
Fat bloom occurs when the cocoa butter in the chocolate rises to the surface, creating a whitish appearance. Sugar bloom, on the other hand, happens when moisture on the surface of the chocolate dissolves sugar crystals, which then recrystallize and form a white residue.
To prevent blooming, store your chocolates in a cool and dry environment, avoiding fluctuations in temperature and humidity. If blooming occurs, simply brush off the affected areas with a clean, dry brush.
9.3 Cracking or Sticking Chocolates
Cracking or sticking can occur if the chocolate is not properly tempered or cooled. To prevent cracking, ensure that you follow the tempering process accurately and allow the chocolates to set at the right temperature. If cracking does occur, you can simply melt and remold the chocolate, ensuring proper tempering this time.
To prevent sticking, make sure your molds are properly prepared and greased before filling them with chocolate. If the chocolates still stick, gently tap the molds on a flat surface to release any air bubbles and help loosen them from the molds. Alternatively, you can place the molds in the freezer for a few minutes to help release the chocolates.
10. Tips for Experimenting with Chocolate
Making your own chocolates provides endless opportunities for experimentation. Here are some tips to help you take your chocolate creations to the next level.
10.1 Pairs and Flavor Combinations
Experiment with different flavor combinations to create unique and exciting chocolates. Consider pairing spices like cinnamon or chili with dark chocolate, or matching fruits like raspberry or orange with white chocolate. Don’t be afraid to think outside the box and try unexpected combinations.
10.2 Texture Variations
Texture can greatly enhance the overall chocolate experience. Experiment with various textures by adding crunchy elements like nuts, crispy rice, or crushed cookies. You can also create layered chocolates by adding different textures within a single treat. Play with textures to create chocolates that are not only delicious but also offer a delightful textural contrast.
With the right ingredients, equipment, and techniques, you can create your own delicious chocolates right in the comfort of your own home. Whether you prefer filled chocolates, molded treats, or hand-rolled truffles, the possibilities are endless. Get creative, have fun, and indulge in the joy of making your very own homemade chocolates.
