So you want to take your cake decorating skills to the next level? Look no further! In this article, “Mastering Cake Decoration Techniques,” we will explore the secrets behind turning an ordinary cake into a masterpiece. Whether you’re a beginner or an experienced baker, this guide will teach you how to decorate a cake like a pro. From elegant piping techniques to creative fondant designs, we’ve got you covered. Get ready to impress your friends and family with your stunning cake creations!
How to Decorate a Cake Like a Pro
Decorating a cake is not only a delicious way to express your creativity, but it can also be a wonderful way to celebrate special occasions. Whether you’re a novice baker or an experienced cake decorator, mastering the art of cake decoration is all about having the right tools, understanding different frosting techniques, and learning various decorating techniques. In this comprehensive article, we will guide you through each step of the cake decorating process, from choosing the right tools to troubleshooting common issues. So let’s get started!
1. Choosing the Right Tools
1.1 Types of decorating tools
When it comes to cake decorating, having the right tools is essential. There are various types of tools available in the market, each serving a specific purpose. Some common cake decorating tools include:
- Piping bags and tips: These are used to create decorative patterns and designs by piping icing onto the cake.
- Spatulas: Spatulas are essential for spreading and smoothing icing onto the cake.
- Cake combs: A cake comb is a tool with different textured edges that can be used to create unique patterns on the surface of the cake.
- Fondant tools: Fondant tools are used to shape and mold fondant into various decorative shapes and designs.
- Airbrush kit: An airbrush kit is used for creating smooth gradients and adding intricate details to the cake.
- Turntable: A turntable is a rotating stand that makes it easier to frost and decorate the cake evenly.
- Offset spatula: An offset spatula is useful for leveling and torting the cake layers.
1.2 Essential equipment for cake decoration
Apart from the specific cake decorating tools, there are some essential equipment that you should have in your cake decorating arsenal:
- Cake pans: High-quality cake pans that are non-stick and have straight sides are important for achieving even and level cake layers.
- Cooling rack: A cooling rack allows the cakes to cool down evenly and prevents them from becoming soggy.
- Cake boards: Cake boards provide a sturdy base for your decorated cake and make it easier to transport.
- Cake stand or plate: A cake stand or plate is not only functional, but it also adds an aesthetic appeal to the overall presentation of the cake.
- Offset spatula: An offset spatula is useful for leveling and torting the cake layers.
- Cake decorating turntable: A turntable makes it easier to spin the cake as you decorate it, ensuring a consistent result.
- Pastry brush: A pastry brush can be used to remove excess crumbs from the cake or apply simple syrup to keep it moist.
- Measuring tools: Accurate measuring cups and spoons are crucial for precise measurements in cake baking and decorating.
- Parchment paper: Parchment paper can be used to line the cake pans to prevent the cakes from sticking to the bottom.
1.3 Tips for selecting high-quality tools
When choosing cake decorating tools, it’s important to invest in high-quality ones that will last a long time and give you better results. Here are some tips to keep in mind:
- Read reviews: Before purchasing any tools, read online reviews to get an idea of their quality and durability.
- Material: Look for tools made from high-quality materials such as stainless steel, silicone, or heat-resistant plastic.
- Comfort: Opt for tools with comfortable handles that provide a good grip, especially if you’ll be using them for extended periods.
- Versatility: Choose tools that can be used for multiple purposes, as this will save you space and money.
- Brand reputation: Consider purchasing tools from reputable brands known for their quality and reliability.
- Maintenance: Check if the tools are dishwasher safe or require hand-washing to ensure they are easy to clean and maintain.
By selecting the right tools and equipment, you’ll be well on your way to creating beautifully decorated cakes that will impress your friends and family.
2. Understanding Different Frosting Techniques
Cake frostings are an integral part of cake decoration as they not only provide a smooth base for the decorations but also add flavor and visual appeal to the cake. Here are some popular frosting techniques:
2.1 Buttercream frosting
Buttercream frosting is a classic and versatile frosting that is easy to make and can be used for various decorating styles. It is made with butter, powdered sugar, vanilla extract, and milk or cream. Buttercream can be tinted with food coloring to create vibrant shades and can be piped into decorative patterns using different tips. It can also be smoothed onto the cake using a spatula.
2.2 Fondant icing
Fondant icing is a pliable sugar paste that can be rolled out and draped over the cake to create a smooth and flawless finish. It is made from a mixture of sugar, water, glucose syrup, and gelatin. Fondant can be colored with gel food coloring and can be used to create intricate designs, figurines, and cake toppers. It provides a sleek and polished look to the cake.
2.3 Royal icing
Royal icing is a smooth and hard icing made from a mixture of powdered sugar and meringue powder or egg whites. It is popular for creating intricate designs, such as lacework, piped flowers, and delicate details. Royal icing dries quickly, making it ideal for creating decorations that need to hold their shape.
2.4 Ganache
Ganache is a rich and glossy mixture of chocolate and cream. It can be used as a filling or as a frosting. It can be poured over the cake to create a smooth and shiny finish or chilled and whipped for a more spreadable consistency. Ganache can also be used to create beautiful drips and borders.
2.5 Whipped cream frosting
Whipped cream frosting is light, airy, and perfect for those who prefer a less sweet option. It is made by whipping heavy cream with powdered sugar and vanilla extract until stiff peaks form. Whipped cream can be used to frost the cake, pipe decorations, or serve as a filling. It should be kept refrigerated until ready to serve.
By understanding the different frosting techniques and their characteristics, you’ll be able to choose the right one for each cake decoration, ensuring that your cakes not only look stunning but taste delicious as well.

3. Basic Cake Decorating Techniques
Now that you have the right tools and have a good understanding of frosting techniques, let’s dive into some basic cake decorating techniques. These techniques will help you achieve professional-looking results.
3.1 Leveling and torting a cake
Leveling and torting a cake is the process of removing the dome-shaped top and slicing the cake horizontally into multiple layers. This allows for even layers of frosting and filling. To level a cake, use a long serrated knife or a cake leveler to cut off the domed top. To torte the cake, carefully slice it horizontally into two or more layers.
3.2 Crumb coating
A crumb coat is a thin layer of frosting that is applied to the cake to seal in the crumbs and create a smooth base for the final layer of frosting. To crumb coat a cake, apply a thin layer of frosting using a spatula, making sure to cover the entire cake. Then, refrigerate the cake for about 15-30 minutes to allow the crumb coat to set.
3.3 Icing smoothing
After applying the crumb coat, it’s time to add the final layer of frosting and smoothen it to achieve a flawless finish. Use a long offset spatula to apply a generous amount of frosting to the cake. Starting from the top, slowly smooth the frosting using a bench scraper or a straight-edged spatula. Continue smoothing until the sides and top of the cake are even and free from any lumps or bumps.
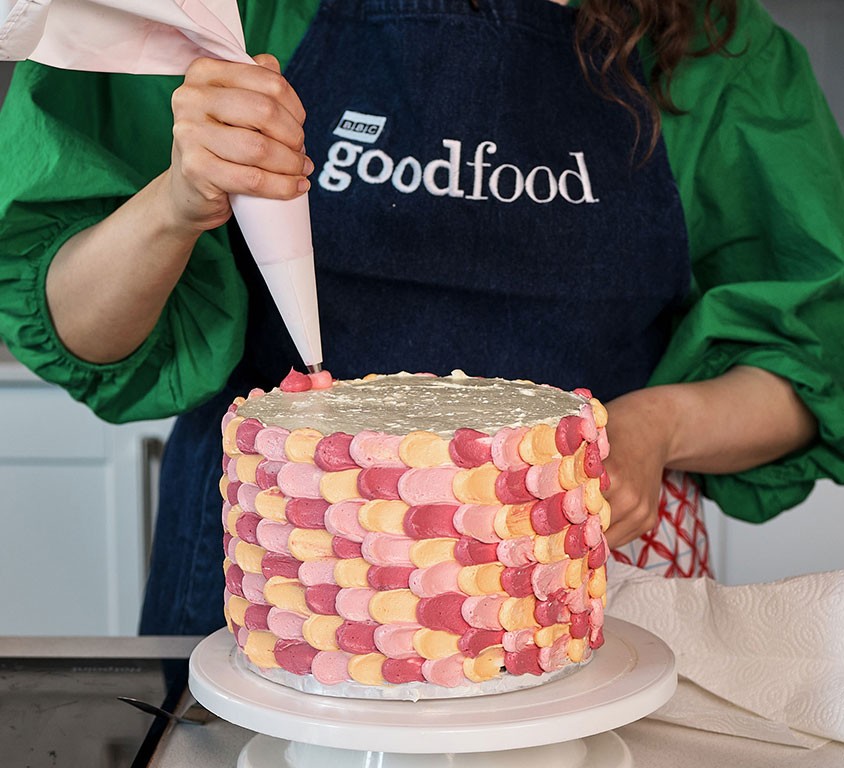
3.4 Piping techniques
Piping is a technique that involves using a piping bag and various tips to create decorative patterns and designs with frosting. Fill a piping bag fitted with a desired decorating tip with frosting, hold it at a 45-degree angle, and gently squeeze to pipe the desired shape or pattern. Practice different piping techniques, such as rosettes, borders, stars, and shells, to add texture and visual interest to the cake.
3.5 Using a cake comb
A cake comb is a tool with textured edges that can be used to create unique patterns on the surface of the cake. After icing the cake, hold the cake comb against the sides of the cake and gently scrape it to create lines or ruffles. This technique adds a professional touch to the design and gives the cake a textured appearance.
3.6 Spatula techniques
Spatulas are versatile tools that can be used for various cake decorating techniques. For smooth edges, use an offset spatula to hold the frosting against the cake as you turn the cake on a turntable. For textured designs, use a small spatula to create swirls or waves in the frosting. Spatulas can also be used for lifting and placing delicate decorations onto the cake.
By mastering these basic cake decorating techniques, you’ll be able to create beautifully decorated cakes with clean lines, smooth surfaces, and intricate designs.
4. Advanced Cake Decoration Techniques
Once you have a solid foundation in basic cake decorating techniques, you can take your skills to the next level by exploring advanced cake decoration techniques. These techniques allow you to create more complex and intricate designs that will impress everyone.
4.1 Creating textured designs
Texture adds depth and visual interest to cake designs. You can create textured designs by using various tools and techniques such as painting the cake with a textured sponge, using impression mats or textured rollers, or hand-painting designs using edible food coloring.
4.2 Working with stencils
Stencils are a great way to add intricate designs to your cakes without the need for freehand drawing. Use a flexible stencil or a food-grade acetate sheet with cut-out patterns. Place the stencil on the cake and use an airbrush or a stencil brush to apply food coloring or powdered sugar through the cut-out design.
4.3 Sculpting fondant decorations
Fondant allows you to create edible sculptures and decorations that can turn an ordinary cake into a work of art. With practice, you can sculpt animals, characters, flowers, or any other objects using fondant. Start with simple shapes and gradually move on to more complex designs.
4.4 Inlay and overlay techniques
Inlay and overlay techniques involve creating patterns and designs on fondant-covered cakes by layering different colors and textures of fondant. The inlay technique involves cutting out shapes from one color of fondant and placing them into a different color of fondant to create a seamless design. Overlay technique involves laying one piece of fondant over another to create dimensional designs.
4.5 Painting on cakes
Painting on cakes allows you to add detailed and vibrant designs using edible food coloring. Use food-safe brushes and gel coloring mixed with a clear alcohol-based liquid, such as vodka or lemon extract, to create a paint-like consistency. Practice different painting techniques, such as wet-on-wet, wet-on-dry, or dry brushing, to achieve different effects.
4.6 Airbrushing techniques
Airbrushing is a technique that uses an airbrush kit to spray a fine mist of food coloring onto the surface of the cake. It can create smooth gradients, add metallic or pearl effects, and achieve a realistic look. Practice controlling the airbrush pressure and moving the airbrush in different directions to create various effects and textures.
By exploring these advanced cake decoration techniques, you’ll be able to create show-stopping cakes that are truly works of art.

5. Incorporating Edible Decorations
Edible decorations are a delightful way to add a touch of elegance and creativity to your cakes. Here are some popular edible decorations that you can incorporate into your cake designs:
5.1 Edible flowers
Edible flowers, such as pansies, roses, violets, and marigolds, can be used to add a natural and beautiful touch to your cakes. Make sure to source organic and food-safe flowers and use them sparingly and as a finishing touch to your cake.
5.2 Chocolate decorations
Chocolate decorations can be made by melting chocolate and piping it into various shapes, such as curls, shavings, or intricate designs. They can be used to adorn the sides, top, or edges of the cake, adding a delicious and visually appealing element.
5.3 Sugar paste flowers
Sugar paste flowers, also known as gum paste flowers, are edible flowers that are made from a mixture of sugar, water, and gum tragacanth or tylose powder. These flowers can be shaped and molded into various floral designs and painted with edible food coloring to add a realistic and delicate touch to your cakes.
5.4 Marzipan decorations
Marzipan is a sweet almond paste that can be rolled out and molded into various shapes and designs. It can be used to create edible figurines, fruits, or intricate details on cakes. Marzipan can also be colored with gel food coloring to achieve vibrant shades.
5.5 Isomalt decorations
Isomalt is a sugar substitute that can be melted and shaped into beautiful decorations such as clear shards, bubbles, or gems. It is perfect for creating decorative borders, cake toppers, or adding a touch of elegance to your cake.
5.6 Using edible glitter and pearls
Edible glitter and pearls can be used to add a touch of sparkle and glamour to your cakes. They come in various colors and sizes and can be sprinkled onto the cake or placed strategically to enhance the design. Just make sure to source food-grade glitters and pearls that are safe to consume.
By incorporating these edible decorations into your cake designs, you can elevate your creations to a whole new level and wow your guests with stunning and delicious masterpieces.
6. Designing Cake Borders and Borders
Adding borders and borders to your cakes not only enhances the overall look but also provides a finished and polished appearance. Here are some popular cake border designs:
6.1 Basic border designs
Basic border designs include simple and elegant patterns such as dots, lines, or shells. These designs can be created using different piping tips and are perfect for adding a clean and classic touch to your cakes.
6.2 Ruffled borders
Ruffled borders add a romantic and feminine touch to your cakes. They can be created by piping large ruffles or small frills using a petal or ruffle piping tip. Start from the bottom of the cake and work your way up, creating layers of ruffles for a stunning effect.
6.3 Piped borders
Piped borders involve using different piping tips to create intricate and decorative designs. Some popular piped border designs include lace, rope, bead, or scroll patterns. Piped borders can be placed along the bottom edge of the cake or used to divide different sections of the cake.
6.4 Fondant borders
Fondant borders are made by rolling out fondant and cutting it into various shapes and patterns. They can be placed along the bottom edge of the cake or layered for a more elaborate design. Fondant borders allow for endless creativity as they can be shaped, molded, and painted to match the theme of your cake.
6.5 Lace borders
Lace borders are intricate and delicate designs that add a touch of elegance to your cakes. They can be created using edible lace mats or by piping royal icing onto a lace design stencil. Allow the lace to dry completely before gently peeling it off the mat or stencil and attaching it to the cake.
6.6 Fresh fruit borders
Fresh fruit borders are a refreshing and vibrant addition to your cakes. Use fruits such as berries, sliced citrus fruits, or kiwi slices to create a colorful and appetizing border. Arrange the fruits along the bottom edge of the cake, overlapping them slightly for a visually appealing effect.
By experimenting with different cake border designs, you can enhance the overall look of your cakes and create customized designs that suit your style and theme.

7. Creating Intricate Cake Toppers
Cake toppers are the perfect finishing touch to any cake. They can be simple or intricate, depending on the occasion and the desired effect. Here are some popular cake topper designs:
7.1 Fondant figurines
Fondant figurines are edible sculptures made from fondant or gum paste. They can depict characters, people, animals, or objects. Start with a basic shape and gradually add details, such as facial features or accessories, with edible food coloring or edible paints.
7.2 Gum paste flowers
Gum paste flowers are incredibly lifelike and can be made to resemble various types of flowers, such as roses, lilies, or orchids. Use gum paste or a mixture of gum paste and fondant to create the flowers. Color them with edible food coloring and use floral wire or toothpicks to attach them to the cake.
7.3 Wafer paper decorations
Wafer paper is a thin sheet made from potato starch, water, and oil. It can be used to create delicate and intricate designs such as butterflies, feathers, or geometric patterns. Cut out the desired shapes from wafer paper using scissors or a craft knife, and attach them to the cake using a small amount of edible glue.
7.4 Modeling chocolate sculptures
Modeling chocolate, also known as chocolate clay, is made from melted chocolate and corn syrup. It can be shaped, molded, and sculpted into various figures and objects. Use your hands or small modeling tools to create the desired shapes and textures, and allow the sculptures to set before placing them on the cake.
7.5 Sugar paste bride and groom toppers
Sugar paste bride and groom toppers are classic and elegant choices for wedding cakes. Use sugar paste or fondant to create miniature versions of the bride and groom, complete with their wedding attire and accessories. Pay attention to the details, such as facial features, hairstyles, and outfits, to capture the likeness of the couple.
7.6 Novelty cake toppers
Novelty cake toppers are great for themed cakes or special occasions. They can be made from various materials, such as clay, polymer clay, or plastic. Look for cake toppers that reflect the theme of the cake, whether it’s a cartoon character, a sports figure, or an iconic symbol.
By creating intricate and personalized cake toppers, you can add a unique and memorable touch to your cakes, making them truly special and one-of-a-kind.
8. Achieving Smooth and Sharp Edges
Smooth and sharp edges give your cakes a professional and polished look. Here are some techniques to achieve smooth and sharp edges on your cakes:
8.1 Crisp buttercream edges
To achieve crisp buttercream edges, start by applying a crumb coat and refrigerating the cake until set. Once the crumb coat is set, apply a generous amount of buttercream frosting to the cake and use a bench scraper or a straight-edged spatula to smooth out the sides and top, creating sharp edges.
8.2 Using ganache for sharp edges
Ganache is an excellent option for achieving sharp edges on your cakes. After applying a crumb coat, pour slightly warm ganache over the cake, ensuring that it covers the sides and top completely. Use an offset spatula to smooth the ganache and create sharp, clean edges. Allow the ganache to set before adding any additional decorations.
8.3 Fondant-covered cake edges
Fondant is known for providing smooth and flawless finishes. To achieve sharp edges with fondant, apply a thin layer of buttercream or piping gel to the cake to create a smooth surface. Roll out the fondant into a large, thin sheet and gently drape it over the cake. Smooth the fondant using a fondant smoother, starting from the top and gradually moving down to the sides, creating sharp edges.
8.4 Techniques for avoiding bulges and wrinkles
To prevent bulges and wrinkles on your cakes, make sure the cake layers are level and well-torted. Apply a thin layer of frosting, known as a dam, around the edges to secure the filling and prevent it from seeping out. When applying the final layer of frosting or fondant, start from the top and gradually work your way down, smoothing out any air bubbles or excess frosting along the way.
By mastering these techniques, you can achieve smooth and sharp edges on your cakes, giving them a professional and polished appearance that is sure to impress.

9. Adding Colors and Textures to Cakes
Colors and textures can elevate the visual appeal of your cakes, turning them into eye-catching masterpieces. Here are some techniques to add colors and textures to your cakes:
9.1 Coloring buttercream
Buttercream frosting can be colored using gel food coloring. Start by adding a small amount of coloring to the frosting and gradually increase as desired. Mix the coloring in thoroughly until the desired shade is achieved. Gel food coloring is ideal for buttercream as it does not affect the consistency of the frosting.
9.2 Working with gel colors
Gel colors are highly concentrated and can be used to achieve vibrant shades in fondant, gum paste, or royal icing. To work with gel colors, start by adding a small amount to the icing or fondant and knead it until the color is evenly distributed. Add more coloring if needed, but do so sparingly to avoid oversaturation.
9.3 Creating ombré effects
Ombré effects involve blending two or more colors seamlessly, creating a gradient effect. To achieve an ombré effect on your cake, start with a base color and gradually add a different shade or tinted frosting, blending them together with a spatula or a blending brush. Continue blending until the desired gradient effect is achieved.
9.4 Texturing techniques with brushes and tools
Texturing techniques can add depth and visual interest to your cakes. Use different brushes and tools to create unique and textured patterns in buttercream, fondant, or royal icing. For example, use a dry brush to create brush strokes or a clean toothbrush to create a splattered effect on the surface of the cake.
By adding colors and textures to your cakes, you can create visually stunning creations that are as delightful to look at as they are to eat.
10. Troubleshooting Common Cake Decoration Issues
Cake decoration is an art, and like any art form, it can come with its fair share of challenges. Here are some common cake decoration issues and how to troubleshoot them:
10.1 Fixing air bubbles in fondant
Air bubbles can form when rolling out fondant, resulting in unsightly bumps on the cake’s surface. To fix air bubbles, gently lift the fondant and smooth it out with clean hands or a fondant smoother. If the air bubble is too large, use a small pin or needle to create a small hole in the fondant and gently press out the air.
10.2 Repairing cracked buttercream
Buttercream can sometimes crack or develop wrinkles, especially if the cake is transported or exposed to temperature changes. To repair cracked buttercream, use a small spatula or an offset spatula dipped in warm water to gently smooth out the cracks. Continue smoothing until the buttercream is even and free from any cracks.
10.3 Preventing colors from bleeding
Colors can sometimes bleed or run into each other, resulting in a muddy or distorted appearance. To prevent colors from bleeding, make sure the base color or frosting is completely dry before adding additional colors or decorations. If working with wet or oily ingredients, such as fresh fruits or ganache, create a barrier by applying a thin layer of buttercream or fondant.
10.4 Smoothing out uneven icing
Uneven icing can occur when applying the final layer of frosting or fondant, resulting in lumps or bumps. To smooth out uneven icing, use a spatula or a fondant smoother to gently press the icing, starting from the top and gradually working your way down. Smooth in short, gentle strokes until the icing is even and free from any lumps or bumps.
10.5 Handling fragile decorations
Fragile decorations, such as sugar flowers or delicate figurines, require careful handling to avoid breakage or damage. When attaching fragile decorations to the cake, use a small amount of edible glue or royal icing for a secure bond. If transporting the cake, take extra precautions by packing the cake carefully and avoiding any unnecessary movements or jostling.
By knowing how to troubleshoot common cake decoration issues, you can overcome challenges and ensure that your cakes turn out beautifully every time.
In conclusion, cake decoration is a delightful and creative way to transform a simple cake into a stunning centerpiece. By choosing the right tools, mastering frosting techniques, and learning various decorating techniques, you can create customized cakes that are as visually appealing as they are delicious. So go ahead, unleash your creativity, and start decorating cakes like a pro!
